I have never done something like this, but thanks to the internet I was able to find the factory service manual for the 4age motor. I would say rebuilding an engine is simple on paper, but actually doing it is very tedious, and time consuming. On top of that, working in an garage in the Texas summer heat didn’t allow me to work on the car the whole day. But I was 6 days off and that was enough time to reassemble 90% of the motor.
Number one thing when assembling a motor is to make sure the parts and work environment are clean. The machine shop cleans the parts but you want to make sure no foreign material has made it way in the nooks and crannies. You spend money at the machine shop, and you don’t a hair follicle be the cause of engine failure.
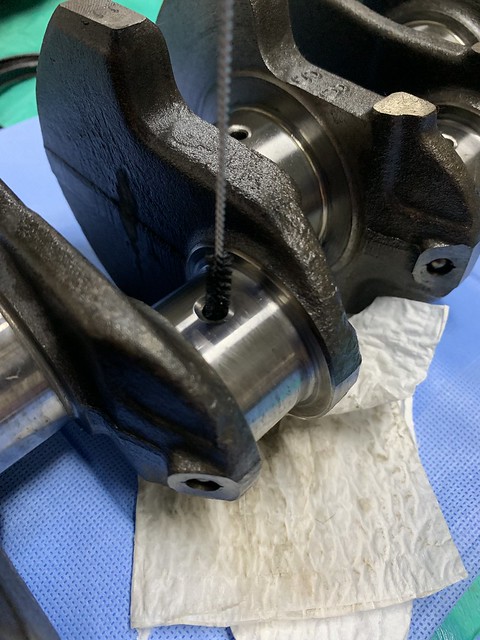
Cleaning the oil gallies is very important. I used brake cleaner, lint free cloths, and various size brushes to clean the parts.

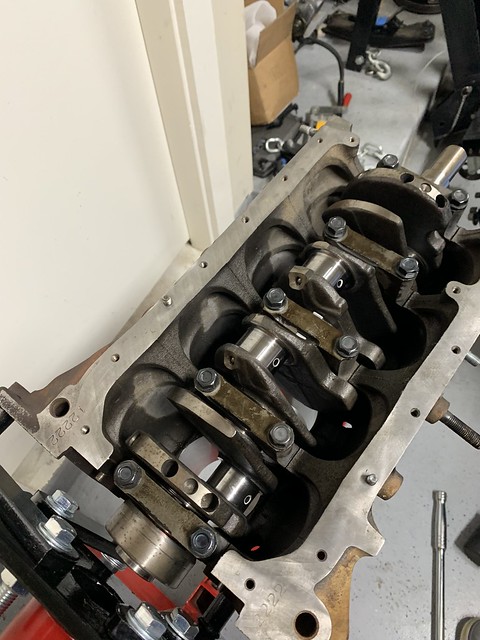
After the tedious part of cleaning, the next step is to assemble the motor. I followed the service manual, and no special tools here. Just have to be careful not to contaminate anything, or scratch metal to metal contacts.

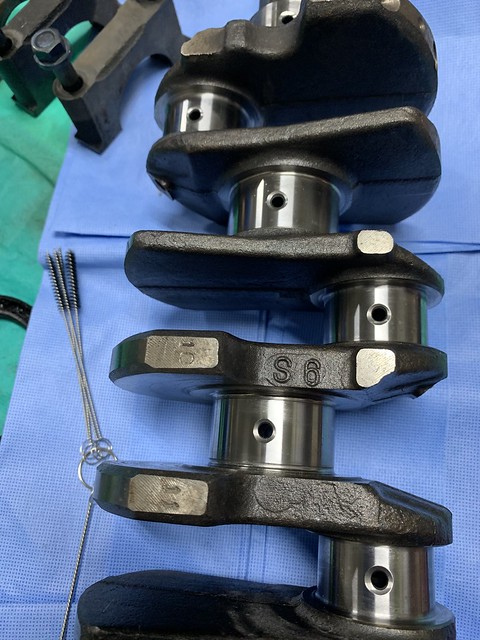
Make sure to inspect the bearings for damage from the packaging. Thankfully all the bearings were in good shape. The crankshaft had to be shaved 0.010in meaning I had to get oversized bearings 0.25mm bigger then standard.

Make sure to lube up all the moving parts. The factory manual states to use motor oil, but I used engine assembly lube. Engine assembly lube is a more thicker oil that will help with the initial start up of the motor.


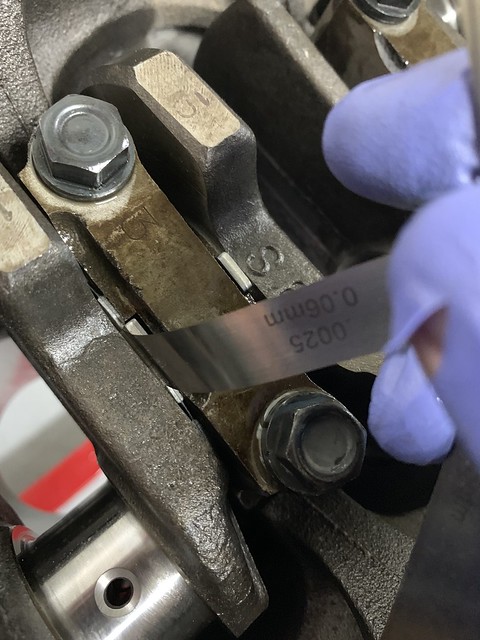
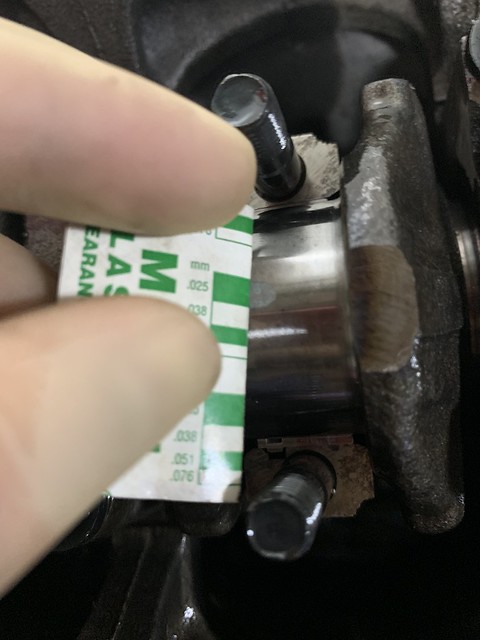
Another important thing when assembling a motor is to make sure the clearances for oil are in spec. There are tools that are designed for this and very accurate, but if you are on a budget, plastigauge works just fine too.

Thankfully all is with in spec. Make to clean off the platiguage wax before reassembling again. I used a feeler gauge to check the thrust clearance. There are more accurate tools specifically for this, but again, those are expensive tools.
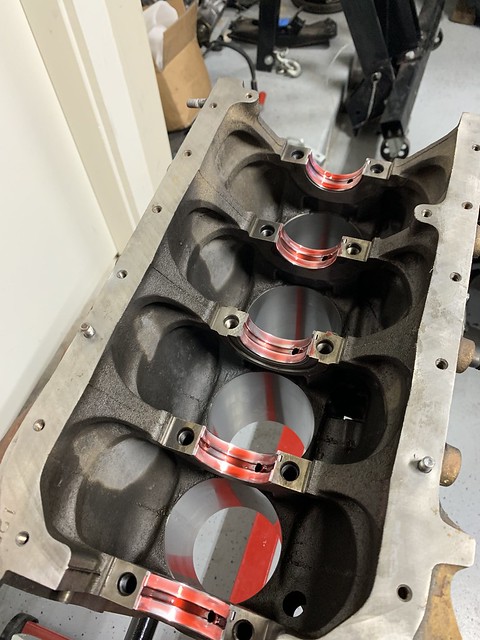
After checking the clearances of the crankshaft, next is to assemble the pistons. I didn’t take much pictures here, but that was probably the most difficult. I had to be careful not to break any of the piston rings. Before I attempted to do that, I took a 1hr break to relax and read up on the manual to make sure I don’t miss anything important. The next hardest thing was trying to use the piston ring compressor and making sure I dont move the rings. My gloves covered in oil made this very tricky, and tasted my patience but I got it done.
Making sure the oil clearance for the piston is within spec.

One down, 3 more to go.

These look like the high comp pistons, but I could be wrong. Would be pretty dope if it is, because this 7 rib block has the 40/18mm crank and rod internals. Meaning lighter rotational mass for a faster reving motor!
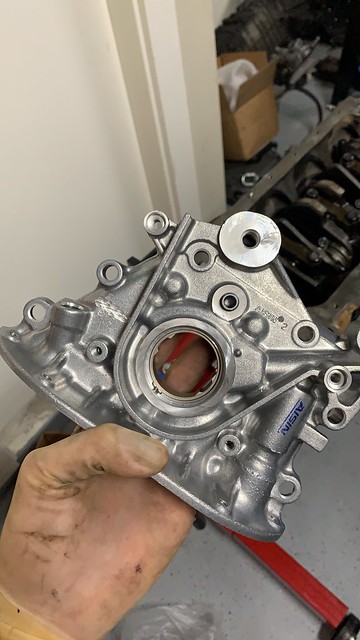
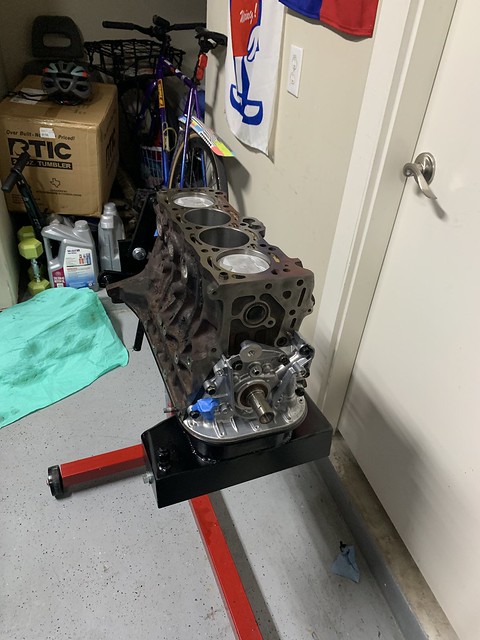
Next was installing my rear main seal and oil pump. I used factory OEM seals and the pump I have has the SQ engineering oil spring for added oil pressure in the high RPMs and oil cooler.

Next step was to install my oil pick up, oil baffle plate and oil pan! Finally the short block is completed! For this build I kept things simple with factory spec bearings and rings, and no other mods. I wanted to be close to OEM spec because once you start to add power mods, thats when things break at the track. Stay tuned for more updates!
