Ozark Road Trip: The End

Untitled

The next morning, was another beautiful sunrise. Today we head back home to Texas.

Untitled

I really like how the Land Cruiser looks after a road/camping trip. Toyota produced the Land Cruiser for a purpose and its a waste for it not be used.

Untitled

Looking back on this trip will always have great memories like all trips. Yeah there are times you’ll run into problems but you don’t let it ruin your experience.

Untitled

We packed up, aired up our tires, and said good byes to our friends. I didn’t take a lot of pictures in the trip but I will have memories of these experiences.

Untitled

9 hours later we made it back to Texas and got ready for the work week. Much needed mini vacation to get away from the hustle and bustle of the city. Everyone needs to just get away and reset. We can’t always constantly workin and not enjoy the things life has to offer.

Special thanks to Ryan and Allan for letting me use their photos!


Ozark Road Trip part 3

Untitled

Sunday morning,  we woke up to the smell of breakfast and sound of the flowing river.

Untitled

Untitled Untitled

Knowing yesterday spent the whole day on paved roads, we had a choice to make. The route tail we are on takes 3 days to complete. Today was Sunday and that means Tuesday we would be out of the trail, at the latest. That was all good, but some of us have to go to work that day. We all decide to continue into the trail as far as we could and take the next bailout point in the afternoon.

Untitled

That left us to cook the lunch food now and pack it for the trail. Time was very important so we would just eat while driving on trail, and gain as much coverage as possible.

Untitled

Nadine was pretty good making containers out of paper plates. Food to go on the trails.

Untitled Untitled

Untitled Untitled

Better to have too much food, then no food.

Untitled Untitled

The family camping trip photo.  Lambo really has the easy life.

Untitled

Untitled

Untitled Untitled

Going in a group is really fun. You kinda get more adventurous in a group because you don’t to have that worry of mechanical issues in the trail since you do have people that has your back. I brought my tools and spare parts just in case. Thankfully no issues.

Untitled Untitled

All packed up. We are ready to hit the trails.

Untitled

Untitled

Untitled

Allan was the lead and had the trail route on his Gaia Maps app. Something to look into, especially when you are out in area with no cell reception. I have google maps and I can download areas for offline mode but you have to do it when you have cell reception. It’s good to have back up just in case google maps doesn’t download, or you run into some other issues.

Untitled

The cool features of Gaia Maps is members can share their route and this was how we were able to do this trail. Members willing to share their experiences so other people have a chance to enjoy the journey too.

Untitled

Untitled

The trails was big enough for Mike’s trailer and putting in its paces. You will get some pinstripes for sure though.

Untitled

The water crossings looked clean and pristine. Not the bayou water in Houston. There was one water crossing that looked shallow but I wasnt able to see the rock bottom on the exit. I figured it wasnt too deep, but it was actually deeper then I thought!

Untitled

I was the first to brave the deepest water crossing on the trail.

Untitled

Ryans 4Runner made it without a snorkel. If I was by myself, I would have double checked the depth and even willing to get my pants wet. Honestly you should always double the check the water depth before any water crossings.

Untitled

Untitled

Later in the afternoon we found a bypass trail that was near a local highway and aired up. Thankfully Allan and his Gaia Maps showed a trail that lead to the highway. I really wished we completed the whole trail but you got to be a responsible adult. Work pays the bills. We all decide to head to Birds Adventure Park for our next campsite.

Untitled

Time to hit the paved roads again. The camp site was roughly 1hr away from the trail exit.

Untitled

The road got more twisty, and higher elevation.

Untitled Untitled

We made it just in time before they closed. The campsite was fairly empty as they recent had a festival couple days ago. Booking a campsite was still a lot cheaper then booking a motel.

Untitled

Everyone went to set up camp but Ryan and I wanted to hit more dirt trails. Thankfully the campsite offered such routes.

Untitled

We aired down and with the route map it time to explore.

Untitled

Untitled Untitled

Untitled Untitled

Always leave the trails cleaner, then what it was.

Untitled

After couple hours on the trail, it was time to head back to the campsite.

Untitled

Untitled

Stay tuned.

Thank you Allan and Ryan for letting borrow your photos!

Ozark Road Trip part 2

Untitled

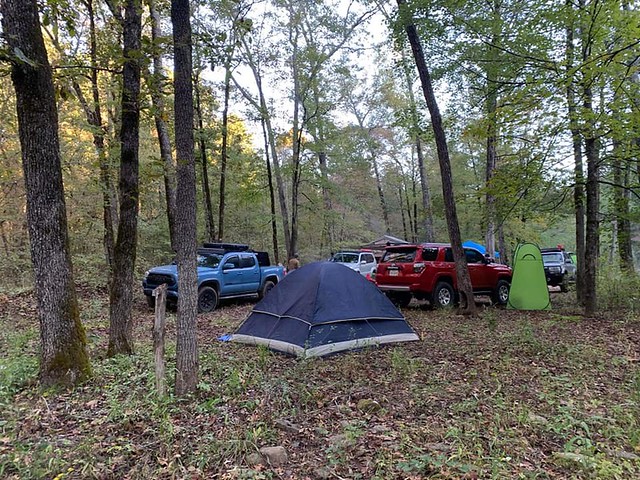
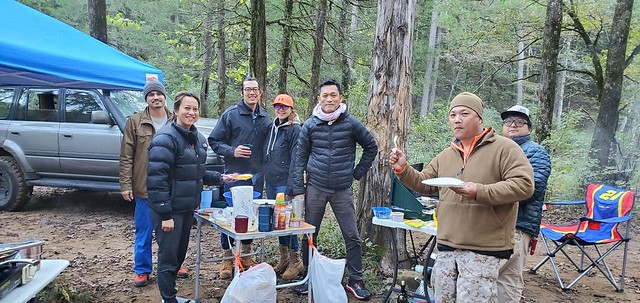
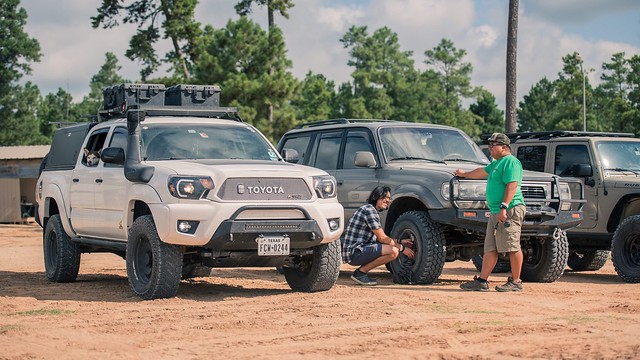
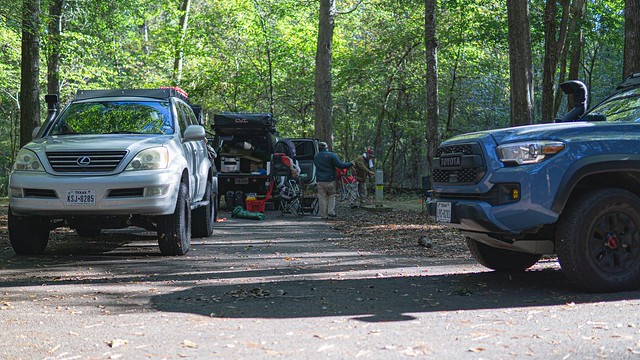
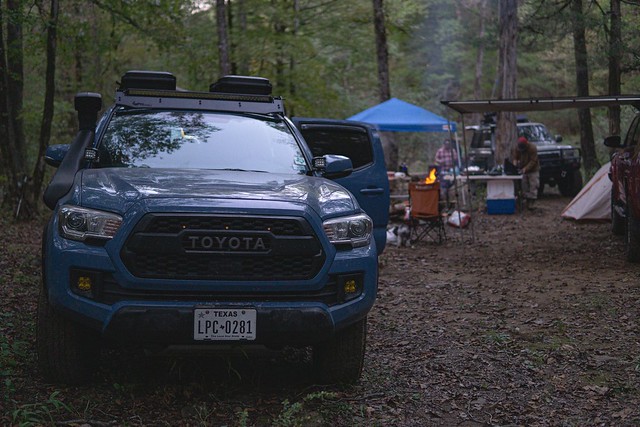
The very next day, a tiny bit hung over, everyone made it to camp. Nads was the last to arrive in his blue Taco, almost at midnight haha.

Untitled

Untitled

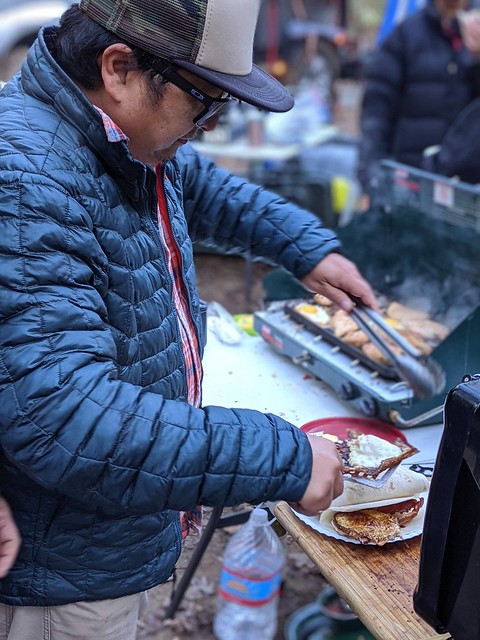
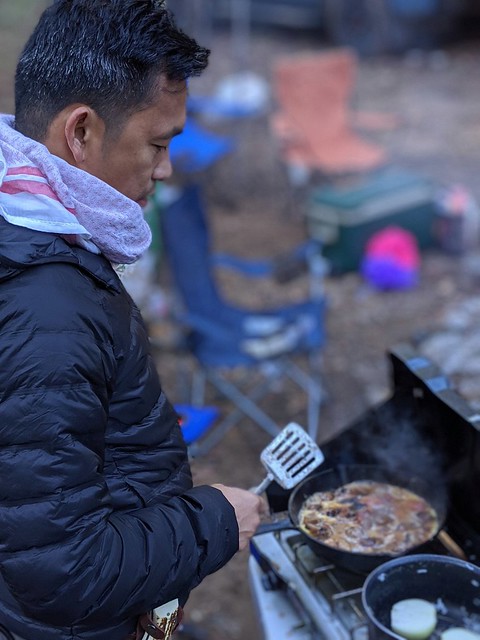
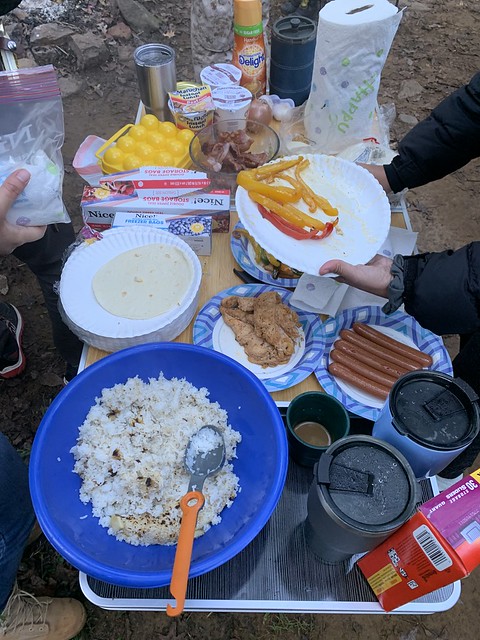
Breakfast tacos… can’t go wrong with that. Allan’s kitchen setup is pretty nice. He always cooks some really tasty food.

Untitled

The rest of the week called for cool temperatures but no rain in the forecast!

Untitled

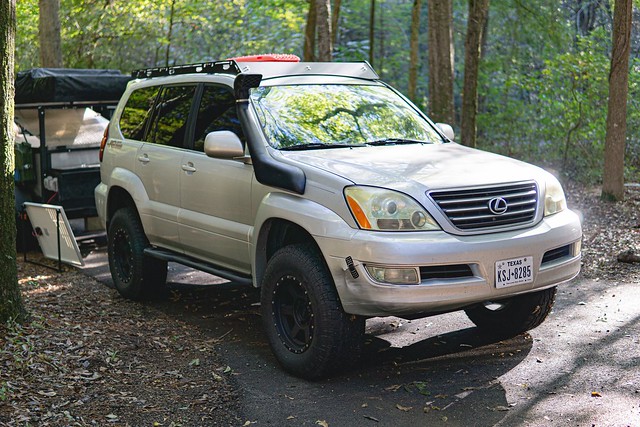
Nadine and I slept inside our Land Cruiser. We have plenty of room to sleep, and I prefer this over ground tent sleeping.

Untitled

The downside is you have to unload all the gear to make bed. Eventually I’ll get a roof top tent for the Land Cruiser.

Untitled

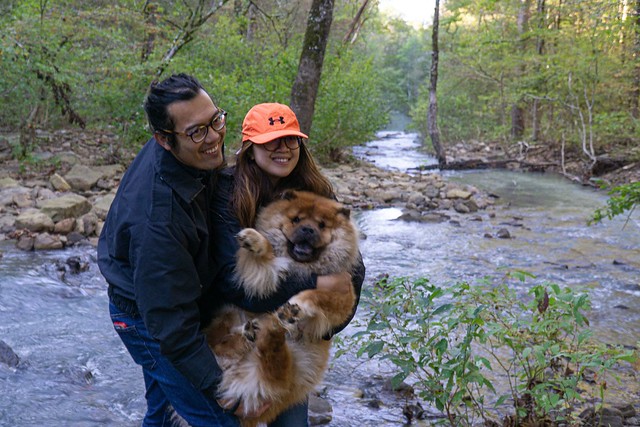
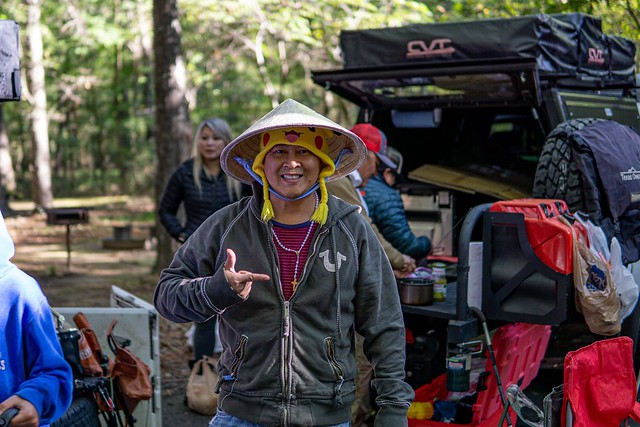
Lambo always supervising, making sure we didn’t forget anything.

Untitled

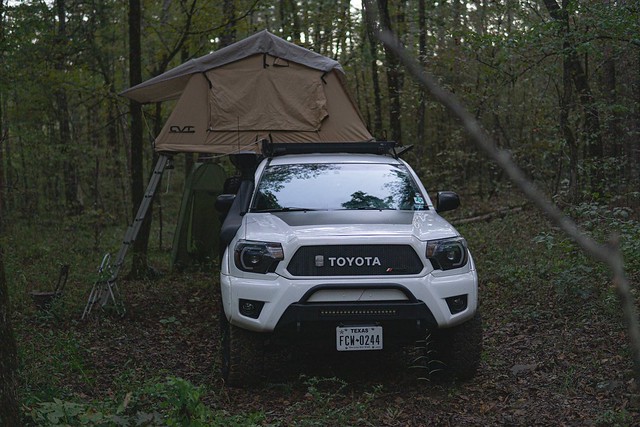
Mike was one the first guys I met, when I got into camping and off roading. He recently built a off road trailer with a roof top tent for his family. If you want your friends or family get into this, you might as well try to make living outdoors very comfortable.

Untitled

Untitled

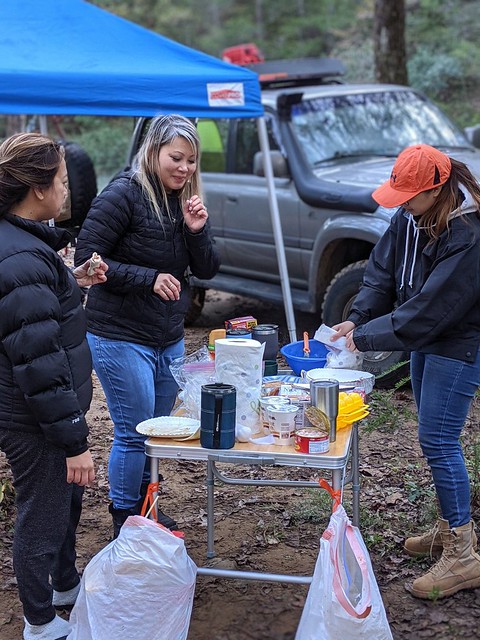
Everyone had breakfast and all packed up, it was time to head into the Ozarks!

Untitled

Untitled

What was supposed to be a 4hr drive, ended up becoming a 6 hour drive. The gas stops seemed to take the longest. Mike and I was getting roughly 10mpg and had to stop 3 times. Plus with a bigger group, everyone taking breaks adds to the time.

Untitled

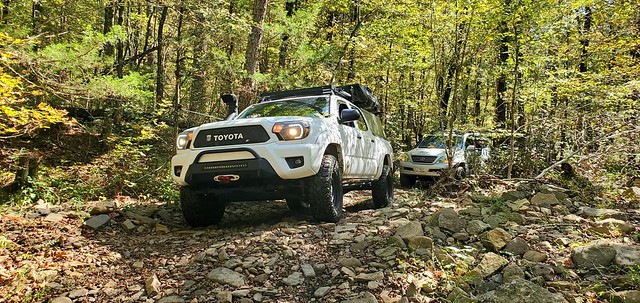
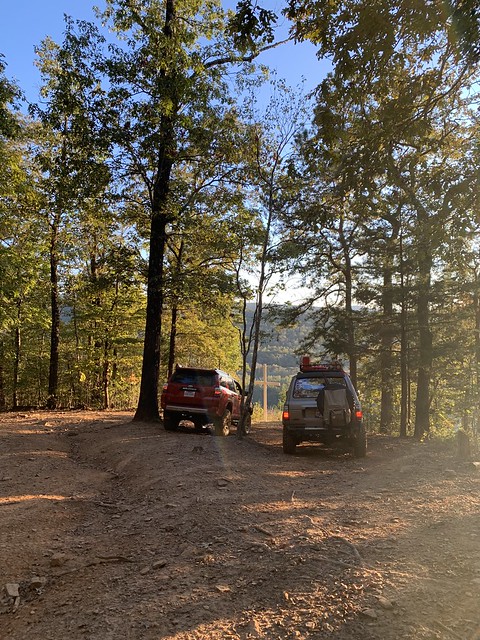
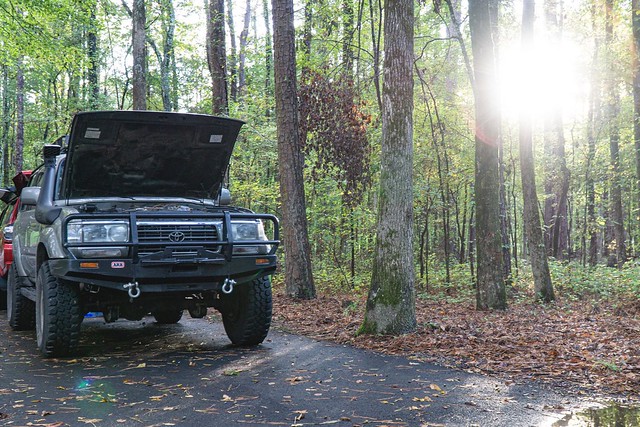
Eventually we made it into the trailhead!

Untitled

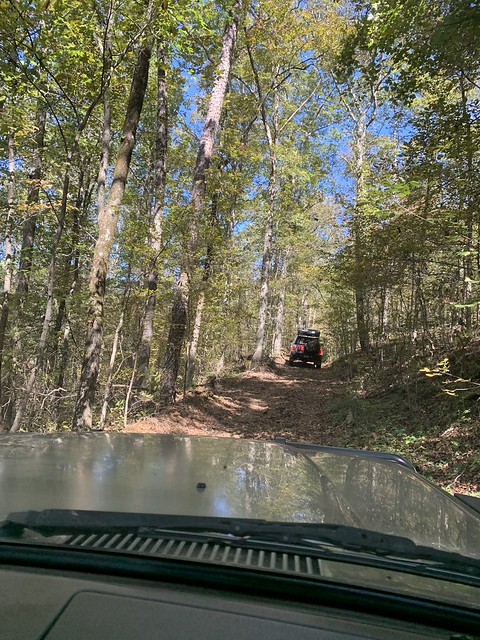
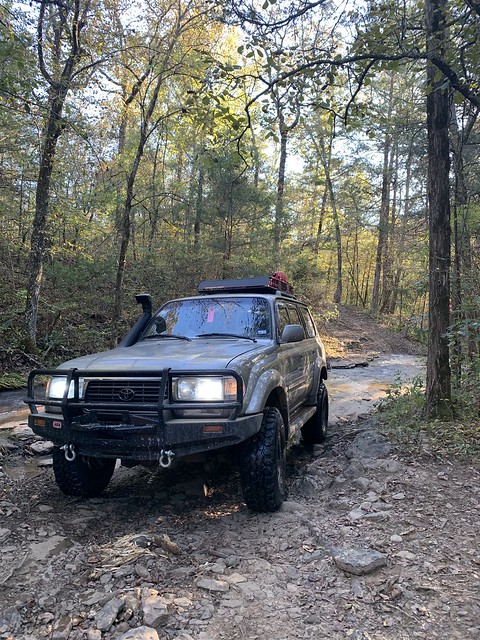
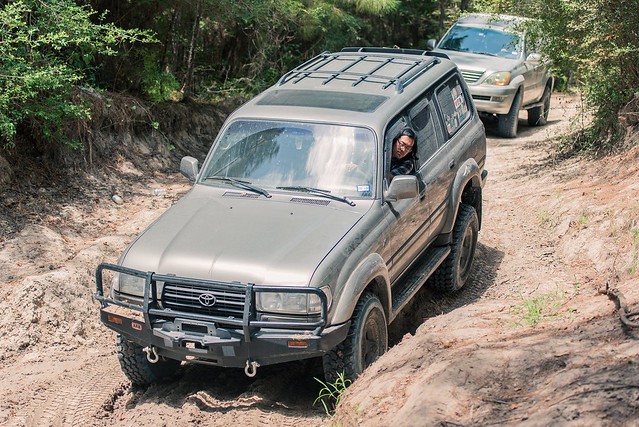
I love dirt roads. You’ll go to places where most people haven’t been.

Untitled

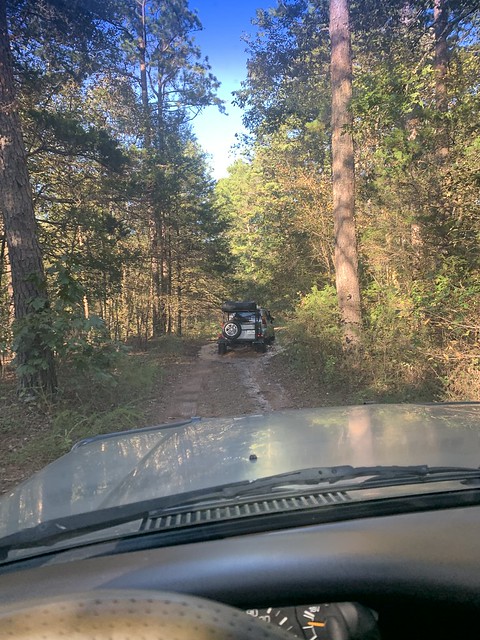
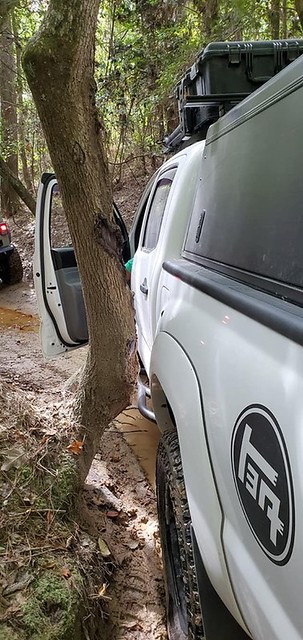
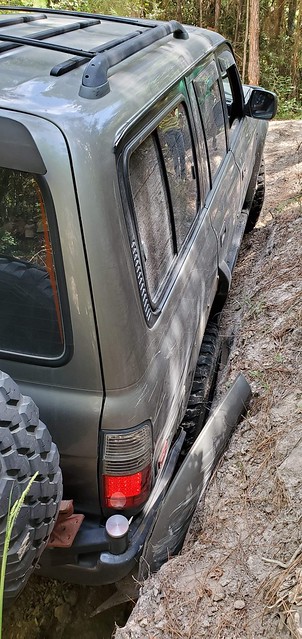
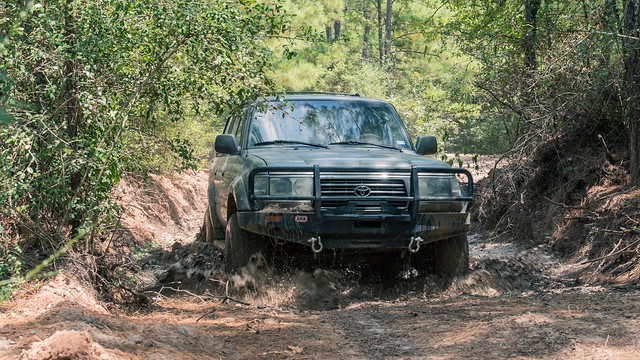
Eventually the deeper you go, the trail becomes tighter, and more bush growth.

Untitled

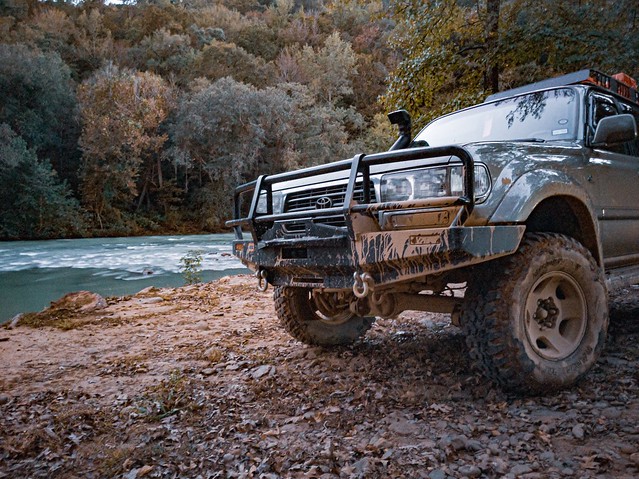
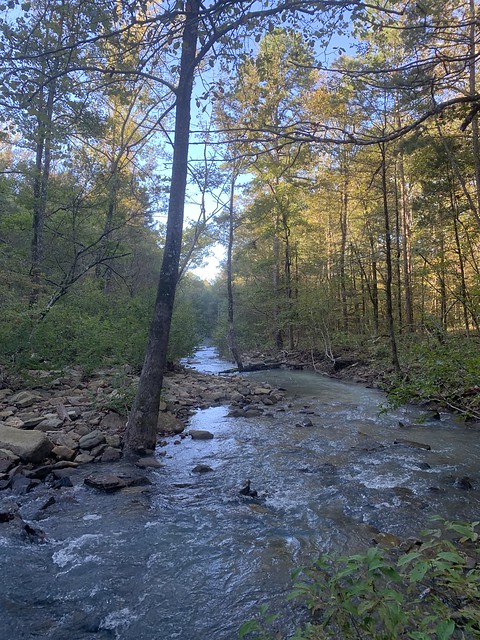
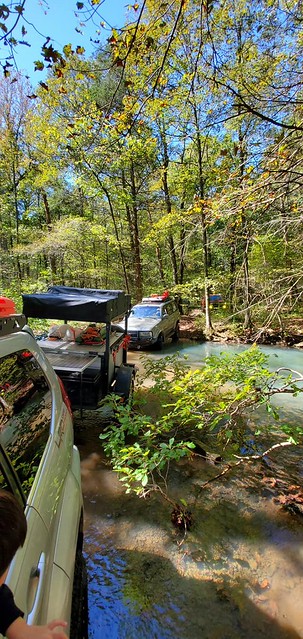
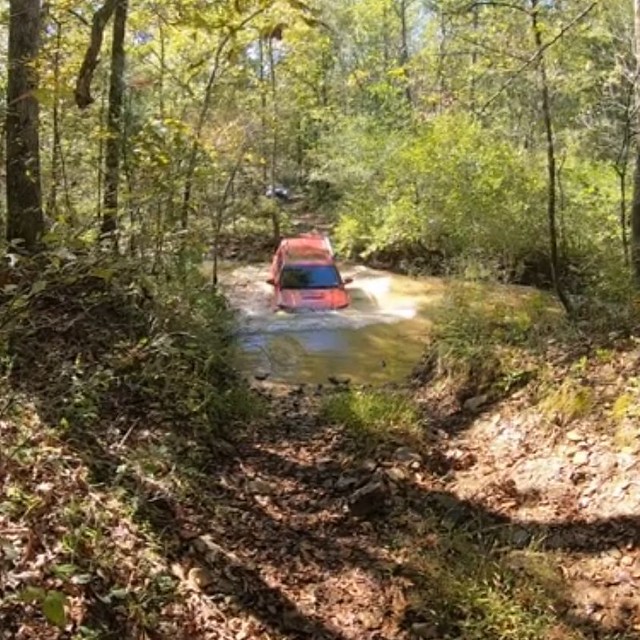
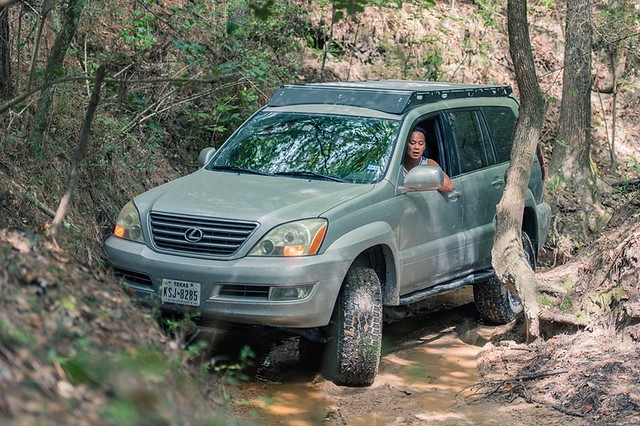
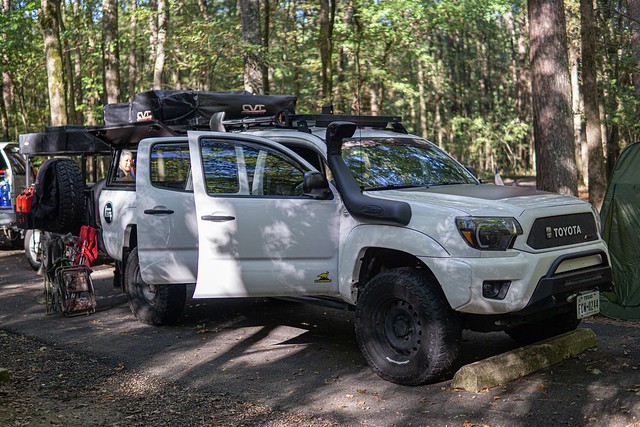
First water crossing of the trail. The Ozark National Forest is known for water crossings, and Im glad I had my snorkel installed in time for this.

Untitled

Untitled

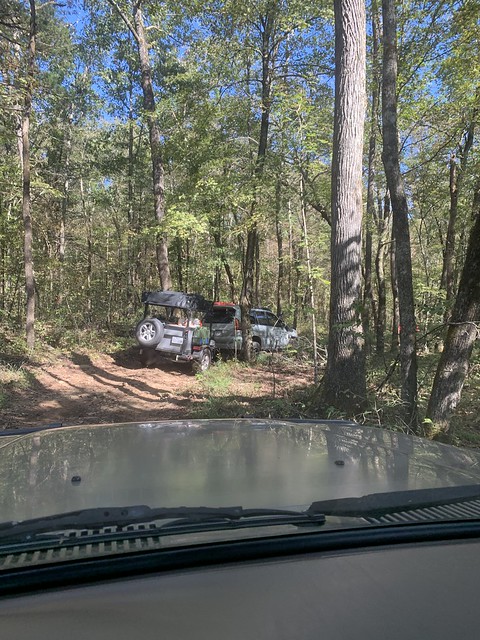
Eventually we made it into the campsite.

Untitled

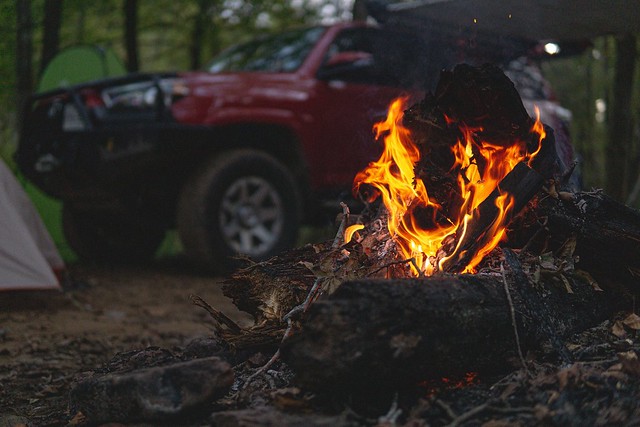
Always have get that campfire going. This is heart of any camping.

Untitled

The campsite was decently big enough for 5 rigs. There was a tire swing too, but a bit too cold for that today.

Untitled

Untitled Untitled

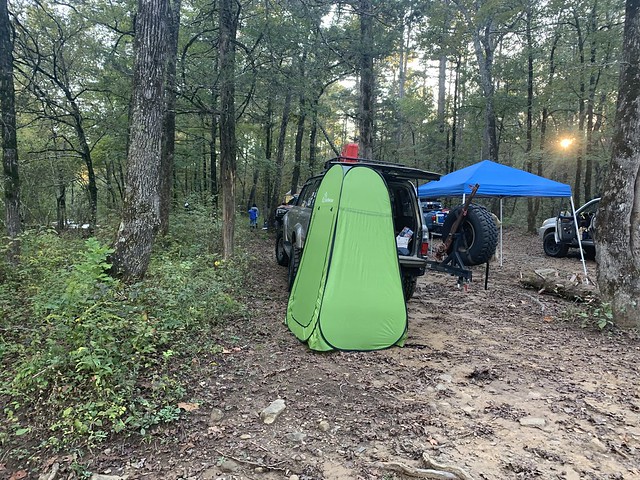
My portable avocado tent. A good privacy tent that allows a lot of light in, but you can still do your business without people seeing you.

Untitled

The humble home away from home.

Untitled

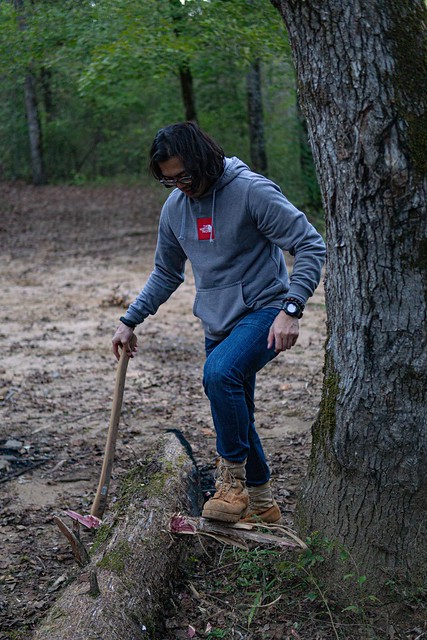
Getting more fuel for the campfire.  As the temps continued to get into the low 40F, this was a good way to warm up.

Untitled

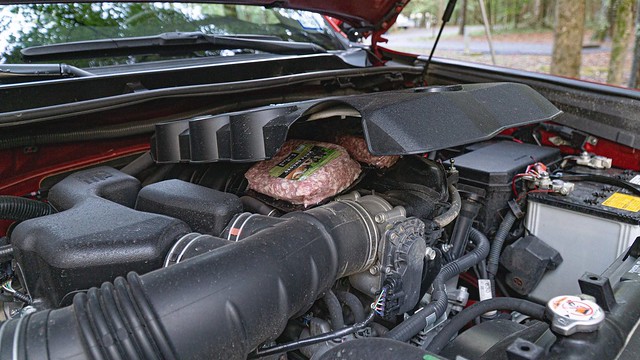
We always eat good when camping. No hot dogs on a stick here, or cold sandwiches.

Untitled

Pork belly with vinegar is the best combo. Especially if you are drinking.

Untitled

Bellini with fruits to offset the fatty pork belly.

Untitled

Roasted corn. Very cool how heat is used to cook something typically bland, and produces a chemical reaction that is very tasty and juicy.

Untitled

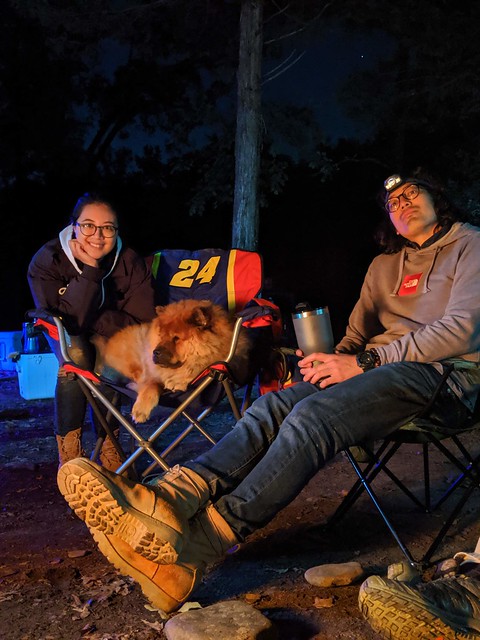
As the night went on, we all hanged out till the campfire slowly died off.

Untitled

More to come…..

Thank you Ryan Magahis for letting use your photos!

Ozark Road Trip Part 1

Untitled

Living and working in the city is nice and I do like how lively the night can be. But there are times when you just want to get away from the hustle and bustle of the city and just escape. Some of my my other off road buddies was thinking the same thing.

Untitled

The original plan was to head into the trail head on Friday late Friday afternoon. Unfortunately some of my friends have kids, and with the school schedule it would bad hard to make the 8hr drive into the Ozarks.

Untitled

We decided, on Friday, to all meet up at Caddo Lake State Park. This was halfway point from Houston to the Ozark National Forest. The really nice thing about camping is how relatively cheap it is to reserve a camping spot. Plus the money goes towards the park maintenance. This this state park has paved roads into the campsite and very RV friendly. Very clean and organized, but I still prefer the ones with dirt.

Untitled

The people with no kids were the first to arrive. The weather called for a cold front which brought rain the whole day. When we arrived the rain had just stopped thankfully.  Started to get the campfire going because damp wood does take a lot longer to warm up.

Untitled

Daylight was getting low, and I had to start prepping the food. I offered to cook on the first day, but the only issue was the meats I had in the cooler was still frozen. The current 40F temperate wasnt making it easier to defrost the meats. I placed the meats on top of Ryan’s 4 runner. The engine was still decently warm to thaw the meats out.

Untitled

It got dark pretty quick, but my headlight made it easy to see what I was cooking. I’ve learned in past camping trips to cook simple, one pot type of meals. Pre cutting the food is also important. Food and cleaning is messy if you do all the chopping at home before the camp site.

Untitled

I cooked up some spaghetti tacos. It’s a spaghetti with taco seasoning hahaha. Not the best combo maybe, but its all one pot and not requiring a lot of work. You got the protein, carbs and veggies. Pretty simple.

Untitled

No camping is complete without a camp fire. Patiently waiting for the others to arrive…

More to come.

Special thanks to Ryan Magahis for some the pro photos!


Project AE86: Learning on Mistakes

As I’m continuing to work on my motor, you learn new things as you go. Sometimes you make newbie mistakes, and some of those mistakes are frustrating and cost a lot of time. One mistake I did was redoing my oil pan.

Untitled

About a month ago, I finished assembling the engine block, and the last step was to install the oil pain. Unfortunately, I was rushing things and one of the bolts that goes into the oil pain didn’t tread exactly right. I didn’t want to keep on going and risk stripping the bolt or ruining the block. I decided to call it and work on other things on the motor. Recently, I was talking to my friend Kwon, and he recommended to tread chase the block and bolts.

Untitled

I went to Harbor Fright and bought tap die kit for $14! Not bad at all. Mainly tap die kits are used to make new treads or bolts, but they can also be used to tread chase too.

Untitled

This was able to clean up the dirt that was in the treads and bolts. Made is alot easer to hang tread the bolts into the pan. A little bit of dirt inside the treads can risk for stripping the treads or bolts.

Untitled

I had to clean and remove the old sealant from the block and pan. That was a pain. The initial install of my silicone was a bit too much and too thick. Some parts of the silicone was still wet even after a month of setting in. Learning from this, I was able to reseal the oil pan properly and feels good knowing I did it right.

Stay tuned.

Project AE86: Hot Oil

Another vital component while at the track, is making sure your oil doesn’t overheat. Most stock cars are not equipped with oil coolers, because on the street you wouldn’t see the extreme temperates that are generated at the track. If an oil overheats, you lose the oil’s lubrecating properties. At track, you can and will kill the motor motor if you don’t address this issue.

Untitled

Some AE86 came with the factory oil cooler but mine didn’t. The OEM version is discontinued. If you happen to find one for sale, the seller is asking an exuberant amount of money. Aftermarket companies makes oil cooler kits for the AE86 and those are pretty expensive too. I opted to buy a eBay universal 19 row oil cooler. Yeah its eBay and its a gamble I’m willing to take to save at least a few hundred dollars. I will be setting up gauges to monitor the vitals, so I say this is a calculated risk. At least I can make sure the oil cooler is really doing its job.

Untitled

The eBay oil cooler kit didnt come with instructions. So its was like figuring out a puzzle piece.

Untitled

I had to mix and match fittings. Eventually I figured it out.

Untitled

I made sure to label the flow too. You can get it wrong and basically could route the oil lines where it never gets filtered or cooled.

Untitled

The good thing everything fits. Later on I will need to shorten the AN lines, once I have the kit inside the engine bay. This should make a big difference at track and keep oil temps down. Stay tuned.

Project AE86: Cooling

Untitled

The 86 is going to see the track 90% of the time and cooling a crucial part for a healthy motor. Since I removed my heater core and running ITBs, the cooling system is fairly simple and straight forward.

Untitled

I replaced some of the old rusted parts of the cooling system. OEM parts are still cheap and I did buy extra and spare back ups for a future 4age build.

Untitled

I also did some cutting of pipes and hoses that I wont be needing.

Untitled

Fresh new seals.

Untitled Untitled

Next I bought a 90 degree heater silicone hose and clamps from Amazon. Thank goodness for 2 day shipping. I cut the the hose to size and clamped it. Not to hard of a job.

Untitled

And just like that… The cooling system is complete. Replaced all the seals and tighten everything up. Next is oil cooling. Stay tuned.

Project AE86: Shifting Gears

Untitled

My 4age motor sealed up and 90% done, I was waiting on some few gaskets and miscellaneous hoses for the cooling system. I figured now would be a good time to work on the transmission. I didn’t have any issues with the transmission shifting or getting into gear, but it looked very dirty and was leaking oil on both ends of the transmission.

Untitled

This meant the gaskets were bad and needed to be resealed. This is a common problem with old cars. Since they are old, a lot of the factory seal and gaskets gets worn out. Thankfully, the parts isn’t too expensive and I don’t have to do it again for many years to come. While the transmission is out, I might as well do it.

First thing I did was clean the transmission. I can tell the leak has been going on for some time with the amount of junk coating the transmission. It wasn’t 100% clean but its good enough for me to work on.

Untitled

I like to make sure the parts are decently clean because its less messy, and you’ll be able to see if there are surface damage.

was able to find the manual for the transmission:

http://www.aeu86.org/forum/Thread-Manuals. I downloaded it online and saved to my hard drive. You never know when the website might go down, and its good to have a back up. 

Untitled

I next removed the front bell housing, and that was pretty easy. Remove the bolts and tap with a rubber hammer. The more difficult part was removing the rear extension housing. The manual states to remove the rear speedo gear but doesn’t specify how to. Searching the online forums and youtube, they didnt provide any helpfull information.

Untitled

I took out the bolt and locking plate for the speedo gear. With lots of PD blaster and constant wiggling of the speedo gear with pliers, I was able to get it off.

Untitled

Trying to pull out the speedo gear was really hard. As you can tell it took me awhile before I was about to remove it. I know the speedo gear, you pull it out but mine was a bit stubborn. I guess thats just the issue with the old cars now. Probably hasn’t been removed since the factory.

I started to clean the inside, and remove the old gasket. Brake cleaner, brushes and a razor blade made the job easy.

Untitled

Untitled

Next was replacing the seals and gaskets.

Untitled

Ideally you want to get OEM, or a reputable aftermarket brand. You don’t to go  back and redo to the job.

Untitled

Apply grease to all the rubber seals. This makes pressing in the seals easier and prolongs the life the rubber from cracking.

Untitled

Good as new.

Untitled

The manual states to apply liquid sealant between the gaskets. I first aligned the gasket and test fitted the front and rear housing. This made sure I wasnt going to run into problems. Putting on liquid sealant is a timed process and if you wait too long the sealant will set before you have time to place the gasket and housing. If that happens, remove the liquid sealant and start over again.

Untitled

Untitled

Torque all the bolts to spec

Untitled

Untitled

I checked if I was able to shift all the gears and spin the gears smoothly. No issues.

Untitled

Finally, its all done.  I’m taking this build one step at a time and slowly completing the puzzle piece. Im learning a lot with the build and yeah I made some mistakes in the process but at least I know what to do next time. Next on the list is the cooling. Stay tuned.

Japanese Tuner Roadtrip

Kinda a very late post, but better late then never! Earlier this year my friend, Joseph and I visited Japan for Tokyo Auto Salon. Our wives didn’t go with us, and that gave us an opportunity to do a lot of car related things in Japan. We only had time to visit 2 shops, because we had to do photoshoot earlier that day. Regardless, we made the most of the day. The first place we visited was Advance.

DSC_0024//embedr.flickr.com/assets/client-code.js

Most of the tuner shops in Japan are not commuter friendly. You could commute via train and bus, but you would have to walk some distances to get the shops. Its is doable, but we rented a car, and highly recommend it. You’ll get to see views of Japan that isn’t seen via public transport. I rented a small Daihatsu K car. K cars are 600c cars and something you can’t get in the States. Super JDM. They are cheap and practical to drive around the narrow streets of Japan.

Untitled//embedr.flickr.com/assets/client-code.js

Advance is a Japanese tuner shop that was also featured in a Speedhunter article. http://www.speedhunters.com/2015/04/stopping-by-the-advance-workshop/. They are a small service shop and they also work on cars built for time attacks or circuit builds.

DSC_0021//embedr.flickr.com/assets/client-code.js

DSC_0023//embedr.flickr.com/assets/client-code.js

Joseph was very excited because he owns a NSX and bought an Advance lip previously coming to Japan.

DSC_0022//embedr.flickr.com/assets/client-code.js

DSC_0034//embedr.flickr.com/assets/client-code.js

DSC_0026//embedr.flickr.com/assets/client-code.js

Their shop is very small but this common in Japan. Space is a commodity and you got make the most of what you got.

DSC_0028//embedr.flickr.com/assets/client-code.js

The shop filled with track cars for repairs or maintence.

DSC_0030//embedr.flickr.com/assets/client-code.js

DSC_0029//embedr.flickr.com/assets/client-code.js

The mechanics where very nice and gave us stickers! I know they don’t sell stickers and was honored I got something special. These will kept in my collection.

DSC_0031//embedr.flickr.com/assets/client-code.js

DSC_0032//embedr.flickr.com/assets/client-code.js

DSC_0033//embedr.flickr.com/assets/client-code.js

DSC_0035//embedr.flickr.com/assets/client-code.js

Next stop was my favorite, Sunbeam Motorsports.

DSC_0042//embedr.flickr.com/assets/client-code.js

I used to own a e92 M3 that I tracked, and I followed these guys in IG couple years back. The shop mainly works on BMWs and mostly BMWs that hit the track. They invited me to check out their shop when I was staying in Japan!

DSC_0036//embedr.flickr.com/assets/client-code.js

This E46 M3 is one of the owners and has been used for time attacks. The M3 is currently getting rebuilt and receiving some improvements.

DSC_0037//embedr.flickr.com/assets/client-code.js

I like cars, and even better to see them actually built for a purpose. A good expample is the E46 headlight. One side is custom fitted as intake for the ITBs.

DSC_0038//embedr.flickr.com/assets/client-code.js

Sunbeam was featured in a Speedhunters article: http://www.speedhunters.com/2017/12/sunbeam-the-footwork-specialists/

DSC_0041//embedr.flickr.com/assets/client-code.js

The shop reminded me of a repurposed townhome. The first floor is the garage, 2nd floor is the lounge and work shop, and the 3rd floor is the reception and showroom.

DSC_0043//embedr.flickr.com/assets/client-code.js

DSC_0044//embedr.flickr.com/assets/client-code.js

DSC_0049//embedr.flickr.com/assets/client-code.js

The wheel display was pretty cool. I loving the modern style, something I wouldn’t mind putting in my house.

DSC_0047//embedr.flickr.com/assets/client-code.js

DSC_0050//embedr.flickr.com/assets/client-code.js

DSC_0045

DSC_0051 DSC_0052

DSC_0055 DSC_0057

DSC_0059 DSC_0061

Visiting the tuner shops in the Japan is something only unique to Japan. The Japanese culture kinda feels like everything has place and purpose. Japanese shops look clean and everything in the shop is there for a purpose. The shops in the States are a lot bigger but some look and feel disorganized.

DSC_0867

The people working at the shops didn’t speak any English and I couldn’t speak Japanese but the universal language of cars understood each other. Ohhh Japan, its such a cool country to visit, and in my opinion the the holy grail of car culture.

Land Cruiser Off Road Battle Scars

 After a fun day at Hidden Falls my friends wanted to do another wheeling trip. We decided to go to General Sam’s Offroad Park in the Huntsville, Texas. Roughly a 1hr and 30min drive from Houston. It was going to hot summer day, Im expecting the tails to be dry and dusty. Untitled

What was supposed to be a nice little off road fun turned to be more then what we expected. The trails on the park where unmarked. They have an app for the park which is cool, but the app doesn’t show the level difficulty of the trail. We took a trail that looked easy going, or so we thought.

Untitled

The trail entrance lead to a somewhat damp river bed. We got some minor pinstripe from the bushes but noting new there.

Untitled

The trail looked wide enough but that changed the deeper we got.

Untitled

Some areas you literally had millimeters of clearance. I couldn’t even open my door to help spot in some areas. Traction wasn’t an issue, it was the clearance.

Untitled

It was soo tight, that body damage was going to happen. And we couldn’t back up because there was another group of 4×4 behind us.

Untitled

I was starting to think if this trail was made for ATVs only.

Untitled

I was able to clear that tree no damage. My ARB bumper took most of the hit. ARB is such a tough bumper, that I didn’t get damage.

Untitled

The very exit of the trail is where all the rigs got the worst damage.  There was a big root on the left side that everyone hit, and then the tight wall on the side of the exit took out my rear flare.

Untitled

I was pretty bummed out it. Trail scars sounds cool, but for me not really cool if it happens on your nice rig. Its like a big scar I have to get used to.

Untitled Untitled

Finally we all made it out.

Untitled

After everyone getting body damage and bruised egos, we hit the main trail to find a good camp spot for cooking.

Untitled

Untitled

We found a good little shaded spot to cook and reflecting on the body damage caused. Joking about it wasn’t that bad or how our wives would get mad at us. Technically it could have been worse, but it could have been avoid if we didn’t take the trail in the first place.

Untitled

Untitled

Battle scars… sometimes it’s cool and sometimes its just a bad reminder on bad decisions. I learn that if the trail gets too hard, dont push and just go back. I had a nice 40th anniversary Land Cruiser that unfortunately got body damage. Probably going to take it to the body this year to get that fixed. Whats done is done, and Ill just have learn from it and go on. Im not going to stop offloading but this experience was a lesson learn. Take it easy, and don’t continue to a trail that might be too tough. Looking forward to the overlanding trip in October. Hopefully it wont be too difficult.