For my birthday, I decided to get a new tattoo! I got a tattoo of my helmet beccause I like track days and the evironment of it. One day I might not be able to enjoy due to whatever life responsibilities and this will be a good reminder of the good times I had. Hopefully Ill be able to continue this hobby till I get very old.
Category Archives: Uncategorized
Project AE86: Short Block Assembly
I have never done something like this, but thanks to the internet I was able to find the factory service manual for the 4age motor. I would say rebuilding an engine is simple on paper, but actually doing it is very tedious, and time consuming. On top of that, working in an garage in the Texas summer heat didn’t allow me to work on the car the whole day. But I was 6 days off and that was enough time to reassemble 90% of the motor.
Number one thing when assembling a motor is to make sure the parts and work environment are clean. The machine shop cleans the parts but you want to make sure no foreign material has made it way in the nooks and crannies. You spend money at the machine shop, and you don’t a hair follicle be the cause of engine failure.
Cleaning the oil gallies is very important. I used brake cleaner, lint free cloths, and various size brushes to clean the parts.
After the tedious part of cleaning, the next step is to assemble the motor. I followed the service manual, and no special tools here. Just have to be careful not to contaminate anything, or scratch metal to metal contacts.
Make sure to inspect the bearings for damage from the packaging. Thankfully all the bearings were in good shape. The crankshaft had to be shaved 0.010in meaning I had to get oversized bearings 0.25mm bigger then standard.
Make sure to lube up all the moving parts. The factory manual states to use motor oil, but I used engine assembly lube. Engine assembly lube is a more thicker oil that will help with the initial start up of the motor.
Another important thing when assembling a motor is to make sure the clearances for oil are in spec. There are tools that are designed for this and very accurate, but if you are on a budget, plastigauge works just fine too.
Thankfully all is with in spec. Make to clean off the platiguage wax before reassembling again. I used a feeler gauge to check the thrust clearance. There are more accurate tools specifically for this, but again, those are expensive tools.
After checking the clearances of the crankshaft, next is to assemble the pistons. I didn’t take much pictures here, but that was probably the most difficult. I had to be careful not to break any of the piston rings. Before I attempted to do that, I took a 1hr break to relax and read up on the manual to make sure I don’t miss anything important. The next hardest thing was trying to use the piston ring compressor and making sure I dont move the rings. My gloves covered in oil made this very tricky, and tasted my patience but I got it done.
Making sure the oil clearance for the piston is within spec.
One down, 3 more to go.
These look like the high comp pistons, but I could be wrong. Would be pretty dope if it is, because this 7 rib block has the 40/18mm crank and rod internals. Meaning lighter rotational mass for a faster reving motor!
Next was installing my rear main seal and oil pump. I used factory OEM seals and the pump I have has the SQ engineering oil spring for added oil pressure in the high RPMs and oil cooler.
Next step was to install my oil pick up, oil baffle plate and oil pan! Finally the short block is completed! For this build I kept things simple with factory spec bearings and rings, and no other mods. I wanted to be close to OEM spec because once you start to add power mods, thats when things break at the track. Stay tuned for more updates!
Land Cruiser Adventures
I went to visit my parents in Austin, and one thing Austin has over Houston is the all outdoor things you can do. Austin has the nice scenic hill country, which is why my wife and some other good friends went out off roading.
The place we went to was Hidden Falls Off Road Park. Ive been here before, but it was just my wife and I. My friend, Micheal, recently bought a Jeep and wanted to check out the off road capabilities. In my opinion I think he should have gotten Toyota, but Im a just a Toyota fan boy.
Ill do admit, Micheal knows how to take good pictures. He is the photographer for Driven and Blessed track events. That’s his jeep in the background. The jeep is nicely fitted: lifted, 35″ tires, winch, diff lockers, and body armor. Basically ready to tackle any trails. Still not a Toyota though.
Hidden Falls was mostly dry and dusty on the trails. Most of the creeks has dried up in the summer months. The trails in Houston are mostly mud pits, after all Houston was built on swamp land. I like the change in terrain in Austin because its more challenging, then just getting muddy.
This climb looked harder then it looks. I was facing the sky at one point and couldn’t see my spotter.
The 80 Series Land Cruiser… just gets better with age.
Solid front axle are perfect for articulation. I like how leveled the rig feels going over rough terrain.
I think the 80 series Land Cruiser is the best off road vehicle that Toyota made. Very good off road capabilities, and still has some nice luxury comforts you don’t get in the older Land Cruisers. They are starting to go up in value, wish I had money and room to another Cruiser.
Taking a break from the track life and working on the 86. Really am thankful.
Special shout out to Micheal for taking the dope pictures even though he has a Jeep. Much love.
Project AE86: Start of The Rebuild
After little over a month at the machine shop, I finally got my motor back! I machine shop was pretty busy so I kind of expected it would take awhile. They inspected, cleaned, honed, decked the block, and grind down the crankshaft. I got new bearings and piston rings. The head got redone and resurfaced, new valve springs and valve stems.
For money spent on a motor rebuild, its probably going to be cheaper if you bought another used motor. But with the 4age that is a different story. Unfortunately these motors are 20 plus years old, and getting rarer to find. Im kinda stuck with what I got. The last compression test I did, it seems like most used 4age will need a rebuild at this point.
Just mocking it up. I did save money by me having to assemble the motor back. For me, it wasn’t just about saving money, but also to learn more about my 4age. If something goes bad, I have no one else to blame but myself. I have never done this before, but I have a 4age engine manual and good friends that gave some tips. Number one import rule when assembling a motor is cleanliness. Next is checking the tolerances and torquing to spec. Lastly is lubricating all the moving parts. Hopefully this big port will, run great so I can hit the track with my own car again. Stay tuned.
Project AE86: Heart Surgery
So with two bad motors, one worse then the other one. Sometimes life just hits you with more issues then joys. I don’t let the problems get to me, instead I really try to learn what I can do to get out of this problem and focus on the goal. Which is get my 86 running, so I can compete in NASA time trails and DE track days.
I was thinking, maybe I can have the machine shop do a refresh on the motor. After all, the compressions did improve a lot after adding a tiny bit oil. She might just need rings and thats it. After getting a estimate for $1750 for a complete engine rebuild as a worst case scenario, that would have been too much money. The machinist did offer another option. I dissemble the motor and bring it in pieces, then it would be much cheaper. Doing that kind of work is something I have never done.
I was able to find a PDF manual on the 4age motor, and after reading several pages on the engine section, I figured it was a doable thing. I took my chances and started to teardown the motor.
One thing I have learned it there is always a sequence to properly loosen or tighten a part. If you don’t follow it properly, then you risk breaking something expensive.
I made sure I took lots of pictures before taking out a part, and to be neat and tidy. Going to take the head to machine and hopefully nothing too expensive to replace. I did notice scoring on the intake camshaft, but Ill try to use the intake cam on the small port and see if that will do. Only the machine will let know if the head is good or not.
Removing the head wants bad and I even made a youtube vid on it:
Have the short block exposed I can see my pistons looked tired with all the carbon deposits. I noticed the very top of the cylinder walls had some gunk or rust. Im thinking because the motor was sitting for soo long, but this motor looks like it can be saved.
Most likely the motor will need new rings and at least a hone. Not too expensive thankfully. Now to disassemble the short block.
Pulled off the pan and no metal shavings noted. This youtube video helped figured out how to disassemble the block.
The 4AGE manual helped a lot, showing the proper sequence on how to remove a the crankshaft and pistons.
All taken out in one day! I made sure to label and mark which side is towards the front of the motor.
This motor was probably spending most its life in the higher RPMs. The block looks fine and no obvious signs of overheating thankfully!
The main bearings look pretty good! Some wear, but my M3 looked way worse and that had only 50k miles.
Rod bearings look good too. No damage, just worn. Im thinking it’ll needs rings, and bearings. Another interesting find, is my big port 4AGE is an early model. I have have the 7 rib block but no oil squirters, and the part number on the piston and rod are from a blue top 4age. That means my internals are lighter then the later model 7rib block. If I was going boost I would worry, but since Im not going that route. I think this motor would rev up much quicker.
All dissembled and ready for the machine shop. Let see what they. Stay tuned.
Project AE86: Engine Woes
I pulled out my old 16v 4age, and was my first time doing so. I was nervous, but thankfully being a track car, there wasnt alot to disconnect or unbolt. The tuner that made my engine harness (R.N.R. Autosport) had all the wires labeled, and that helped a lot.
Rust in the coolant lines. That isn’t a good thing, but I was told you can still run the car just fine with it. Kind of a bummer though.
Pulled out the motor in less then an hour!!! My neighbors didn’t even notice.
Next before I start to swap the the parts out, I had to do a compression test. Learned my lesson from the other motor. Even though it ran, it doesn’t mean the motor was healthy.
We proceeded to to separate the the transmission from the motor and mate it to the newly acquired large port 16v 4AGE. The reason why we did that is because you have to crank the motor with the starter to do an accurate compression test. Just hand cranking the motor for the compression test wont be accurate, and you can’t use an impact gun on the crankshaft because you will risk breaking something.
All you need to crank a motor when its outside of the car is a starter, something to mount the starter to, and the flywheel.
The clutch is in good shape.
The transmission looks like I need to replace the seals. Old cars, simple to work on but if they haven’t been maintained well, they require lots of hour and money to get back to it former glory.
We swapped over the transmission and proceeded to do the compression test!! If you not so sure how to do this, here is a video that helped me:
We did the compression test and wasn’t that great. We did add a tiny bit of oil did help with the compression, but that means the piston rings are probably worn. If I put this motor in the current condition, their might be a possibility that the motor will burn oil and smoke. Now Im just thinking, no what 4age motor I put in here they all need a rebuild since they are getting old.
Well that leads me to other issue, how do I rebuild a motor? More on the next post.
Project AE86: New Heart
Having a a bad motor, I have 3 options: rebuild the motor by a machine shop, get another 16v 4age thats good, or just cut my losses and sell the car. Well, finally speaking just cutting my loses would be the best thing. But when you put time and effort into something, then you tend to grow an attachment to it. You become more determined to accomplish your goal. I could rebuild my motor, but local machine shops are asking $1300-$1700 for a full rebuild. I’m not even sure if the block or head are good enough for a rebuild. The machine shop will determine that, but that means paying for teardown too. So that leads me to buying another 16v 4age.
Looking for 16v 4age seemed pretty slim. There wasn’t any on eBay and when I was on facebook market place I didn’t see any recent post for 16v 4age for sale, yet alone locally in Houston. My friend, Thaison, offered his other small port 16v 4age. Unfotunatley he lives in Austin, and Im not sure when I’ll be able to go back to Austin to pick up the motor. So I started asking some car friends if they knew anybody that might have a 16v 4age.
That leads me to Harris, who has a RHD AE86 GTS that he pulled the 16v 4age, because he wanted more power. He swapped in a 20V black top 4age ITBs. His build is pretty baller, with custom engine harness, coil on plug, and more high end goodies. That RHD AE86 was previously owned by my friend, Chris, which had the 16v 4age. I know the AE86 was running pretty good before the motor was pulled out. My chances of this motor being healthy was high.
I now have a motor, but how am I going to able work on it. I had to buy a engine stand and engine hoist. Lucky I still had my Harbor Freight coupon and I scored a cheap engine stand. But the engine hoist was another thing. Brand new from harbor freight was at least $175 and I’m probably only going to use maybe couple of times.
I started to look at the classifieds: craigslist, and Facebook marketplace. I was thinking, I’m sure there will be some people that want to get rid of their engine hoist after finishing a project car or doing a motor swap. Thats when I scored a really good deal. I picked up an engine hoist, 4 jack stands, 4 wheel dollies and an engine leveler for $100! The engine hoist was practically brand new. The seller had to sell his project car, and this was the leftover tools. I always try to buy used if I can, because you save money and most cases its barely used.
JDM 16v 4age large port 4age!!! Since its a large port, I have to get the ITB adapter for it, because the small port I have wont fit. But everything else I’ll swap over the parts and put new gaskets. Next step is pulling out the motor in the AE86. This will be my first engine pull. I’m kinda nervous and excited at the same time. My goal is to be able to pull it out in one day. I hope my neighbors wont mind, because space can be tight living in the city.
I’m still going to compression test, and leak down test my newly acquired motor. I want to make sure the motor is 100% healthy. You learn from your mistakes, just make sure you don’t repeat them. I know friends means the best intentions, and there will be times when issues happen, but I don’t let get to me. People always show their true intentions, especially during the bad times. If your friends offer to help with the cause, then you know they are good friends. Thanks to the homies that help me get this far!
“I have money, it’s trust and character I need around me. You know, who you choose to be around you lets you know who you are. One car in exchange for knowing what a man’s made of? That’s a price I can live with.” -Han
Project AE86: One Step Forward, Two Steps Back
Well, no one said life was always going to be easy. Found out the hard way, the motor on the AE86 is no good. Pretty bummed and disappointed about the outcome.
As the tuner was setting up the dyno, and adjusting the ecu setting, she started to smoke under load. Didn’t even get to do a dyno pull. The tuner was thinking originally its from the header wrap but the smoke was coming back form the exhaust.
The 2nd video shows how bad its was. She revs up, but its just ticking time bomb. Thankfully no rod knock but if we pushed it, she might have gotten to that point, or even worse and blow the motor. We canceled the tune and did a compression and leak down test.
Cylinders 2 and 3 are in very bad shape. Lesson learned, always do a compression test before buying a motor. I did see metal shavings when I did an oil change, and smoked a bit on idle, but I didn’t think much of it. All I can do now at this point is rebuild this motor or get a good motor and swap that… Life teaches you things, and you learn from mistakes. Can’t give up now.
Fresh Meat
I finally bought NT01 for my Volk wheels. I chose the meaty 205/55/14 size because I wider footprint, meaning more grip at the track. But the 205/55/14 sizes are limited, and I only had two choices. I chose the Nitto NT01 over the Toyo R888 because I’ve had personal experience with NT01, and the Tokyo R888 tire is more of show tire. Some the track guys that ran R888 didn’t grip or last as long as the NT01s.
Meaty. Kinda funny how I was all into the stretched tires and poke.
Fitment on point.
Wheels make or break a car, and you cant go wrong with TE37. Pretty soon she will be heading to the tuner!
Toyota Jamboree 2019
Toyota Jamboree is a 4 day event that involves Toyota 4x4s, vendors, and off road trails, with competition events. Durning the multi day event, you can get a hotel nearby or go camping at the off road park itself. I would recommend the camping because nothing beats wheeling and camping with your friends.
This was my wife and I first time at Toyota Jamboree but we have gone off roading before in past. The one thing we never did was primitive camping, and which is basically camping without restrooms or running water on site. For me I didn’t mind, but I know with wifey it was a big thing. I understand that, and what I have found out is if you make camping more luxurious or more comfortable for your significant other, then they will want to go on more trips with you.
Lambo and wifey enjoying the time spent. Getting away from the city life is nice. I wouldn’t sell my house in the city for the suburb life, but to live in the country, I maybe would.
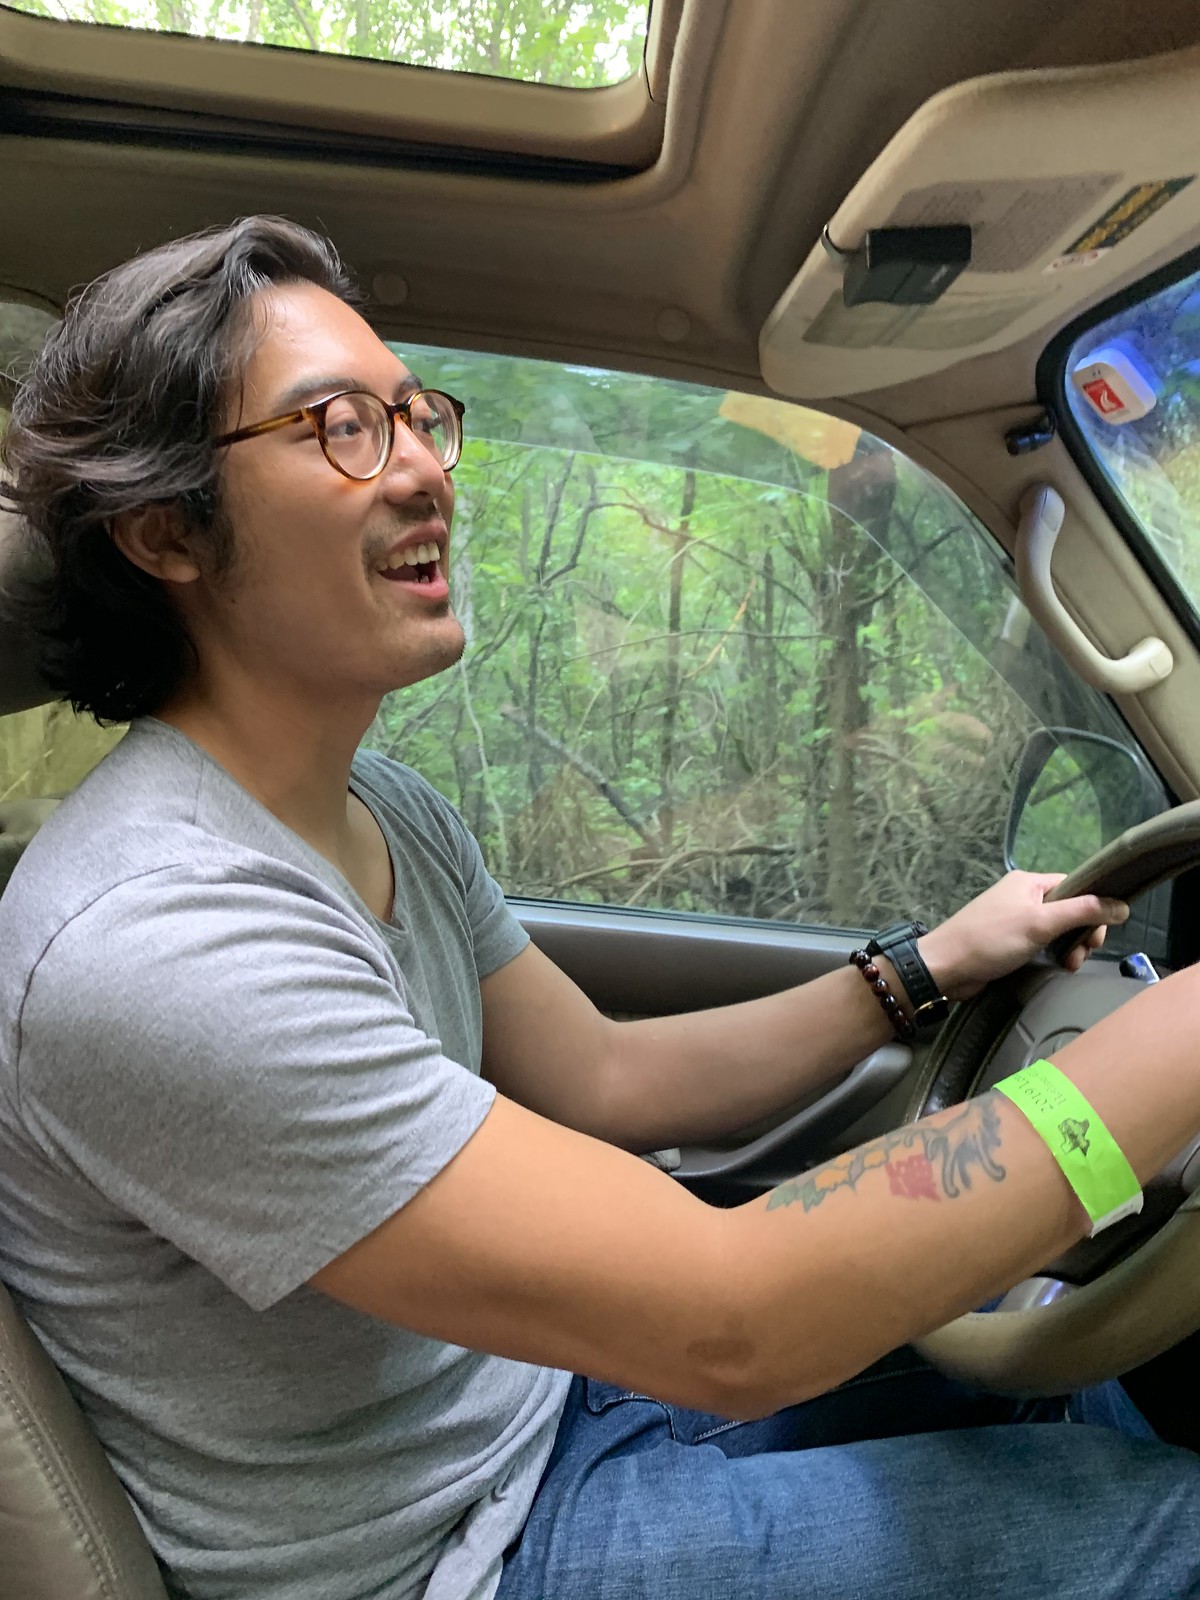
Airing down for the off road trails. The forecast called for rain and mud. I was excited for that!
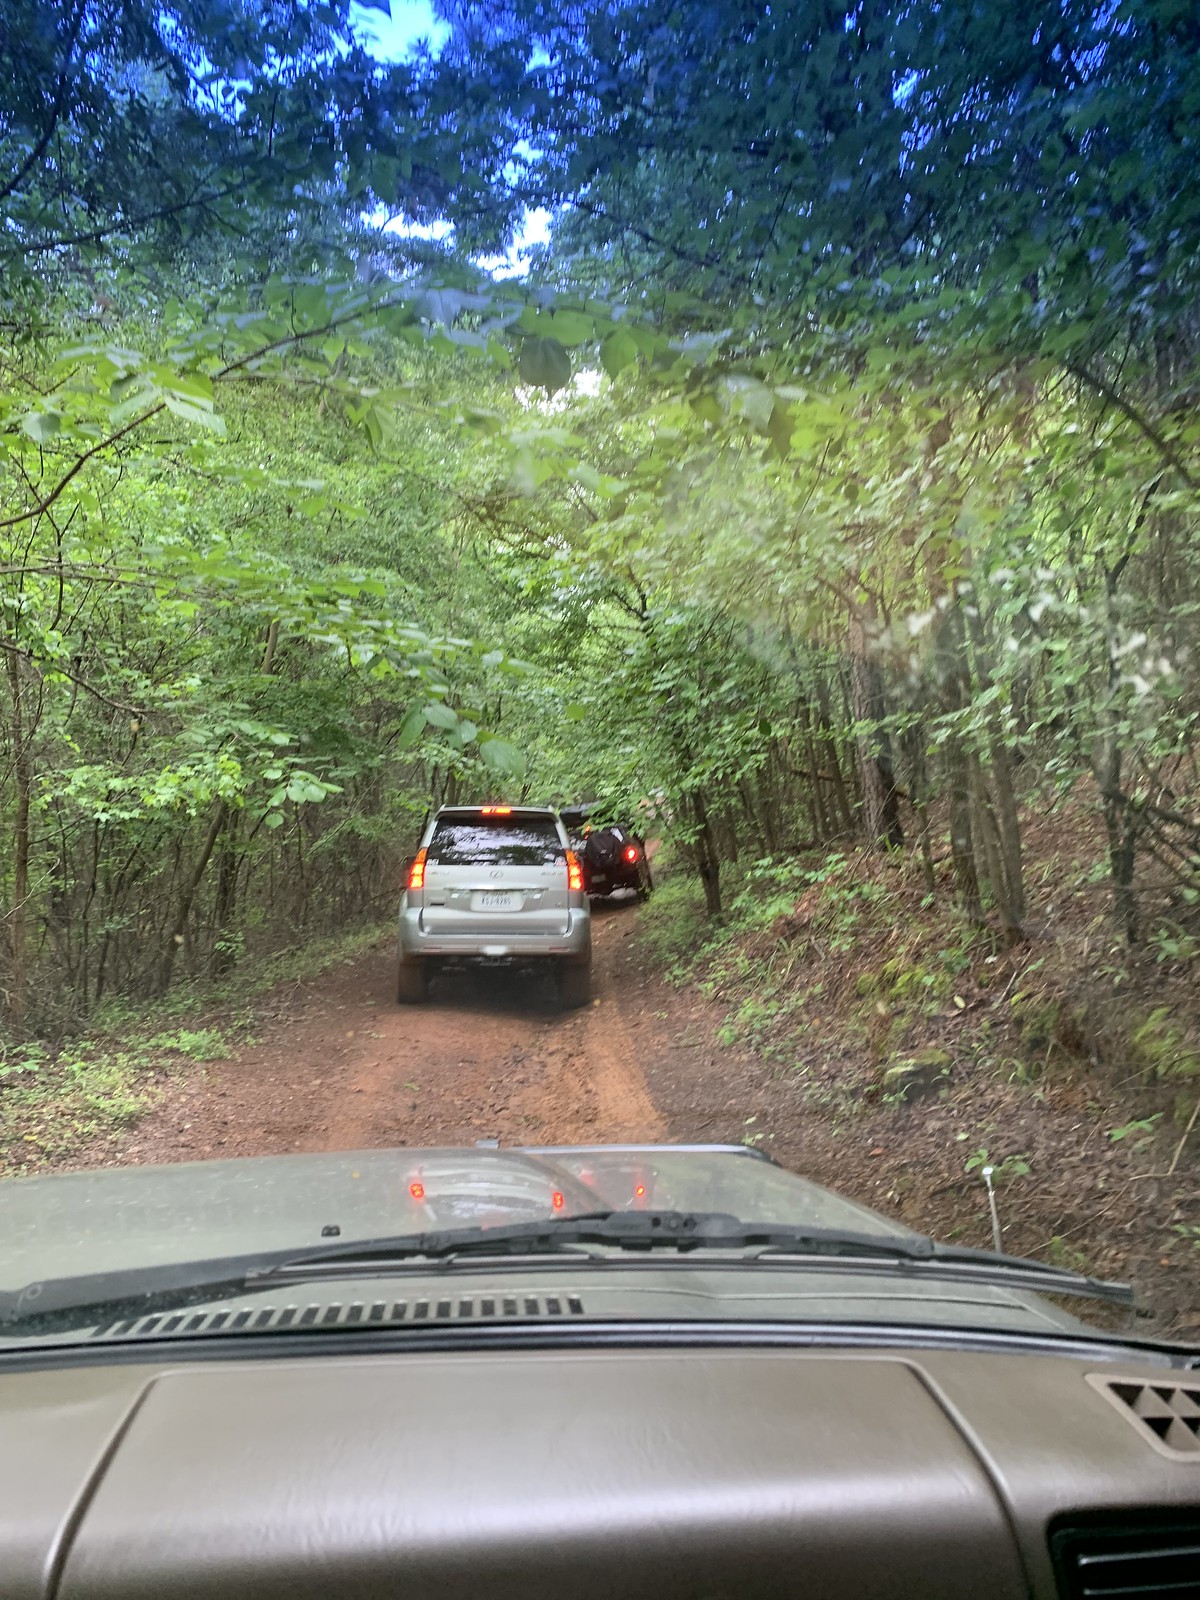
Riding the trails with the homies added a better sense of security and confidence. When we go off roading alone in the trails sometimes you get nervous if you are going to get stuck or if any help will come in such a remote place. I do like the privacy but with friends it just makes it more fun.
The Land Cruiser was pretty clean at this point. But by end of the weekend it was a different story.
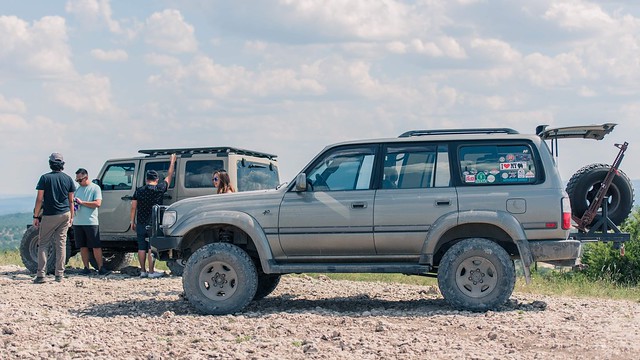
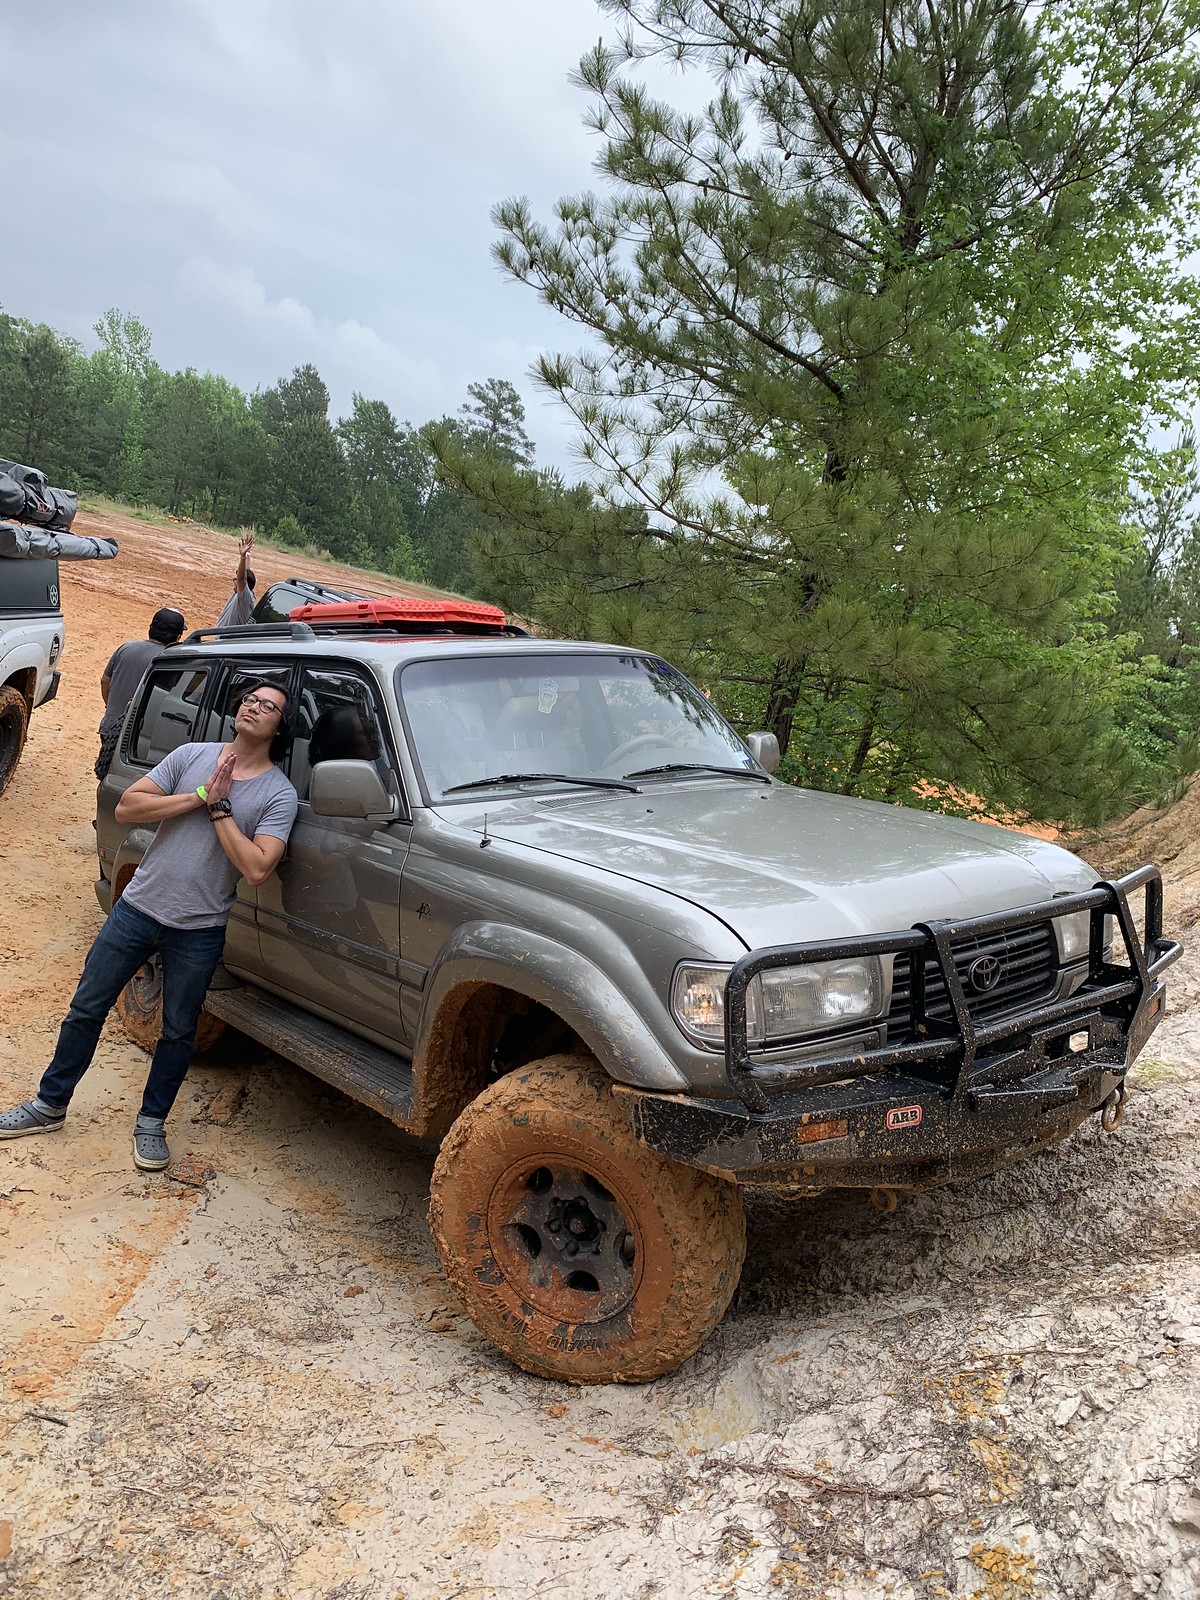
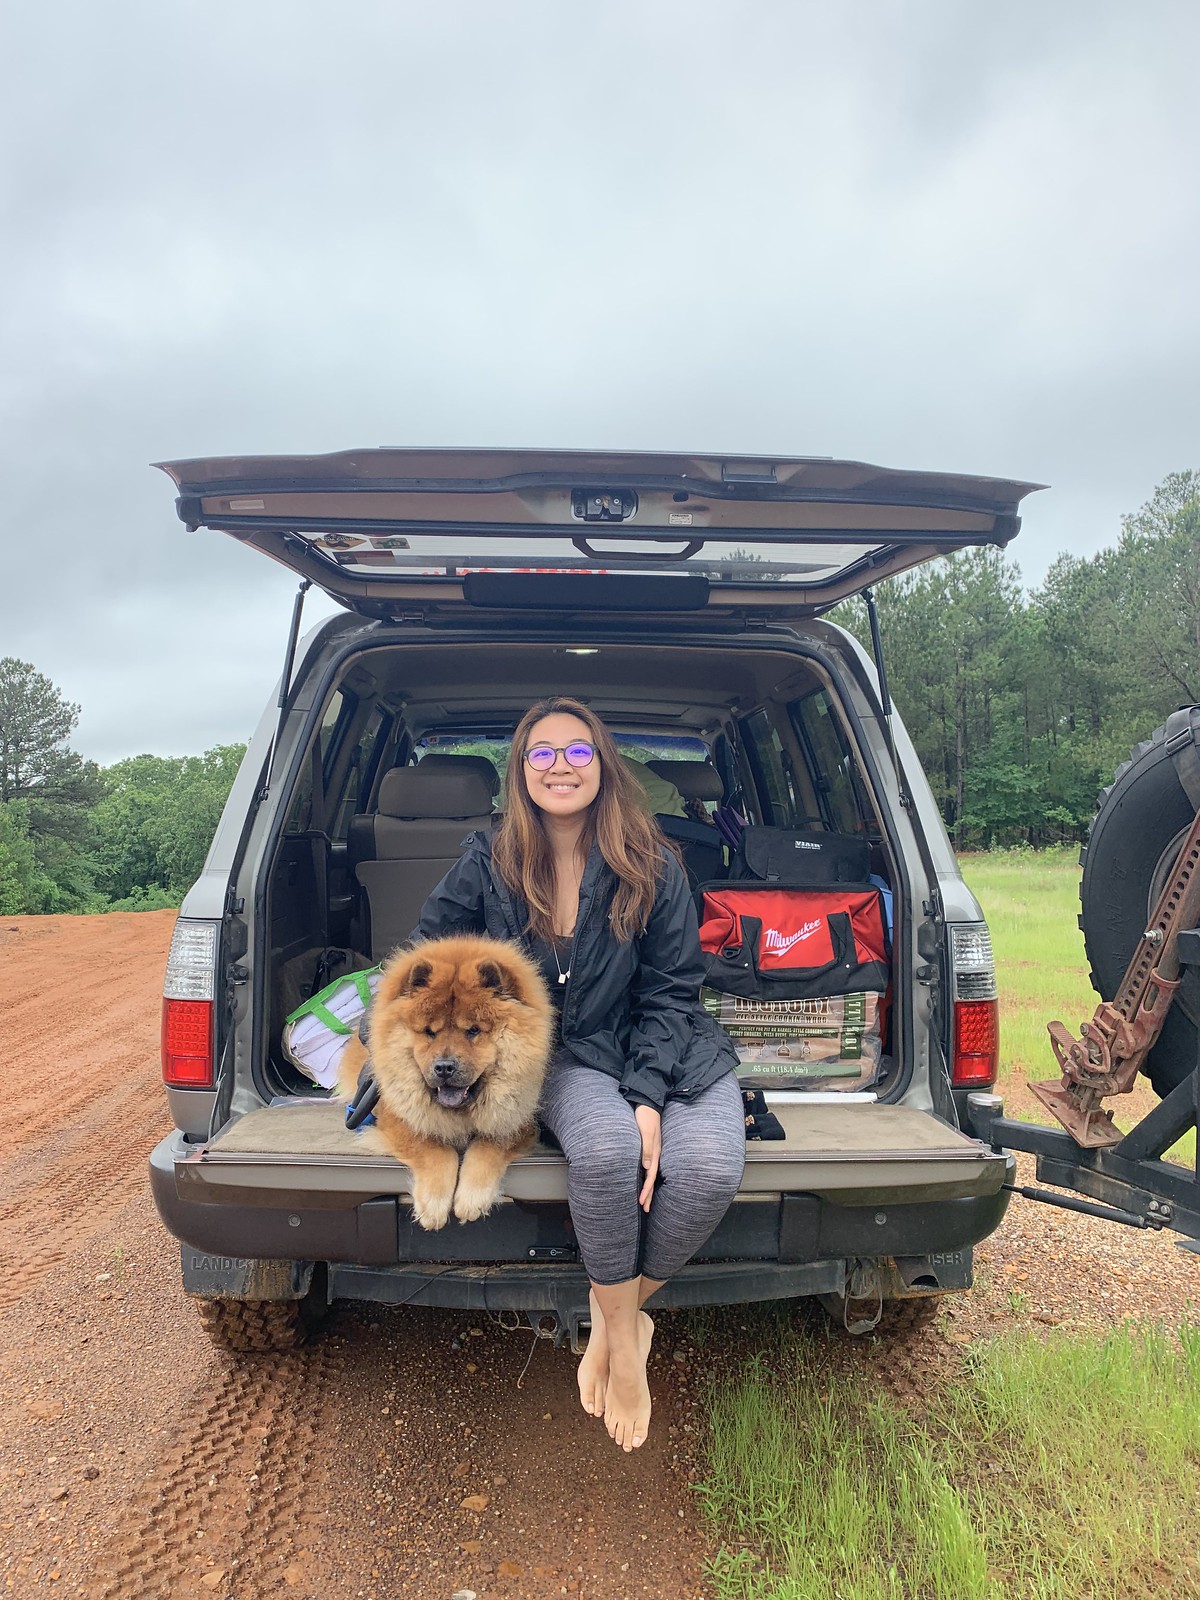
Xerx and Gretchen with their dog Chewy. Lambo’s girlfriend. 
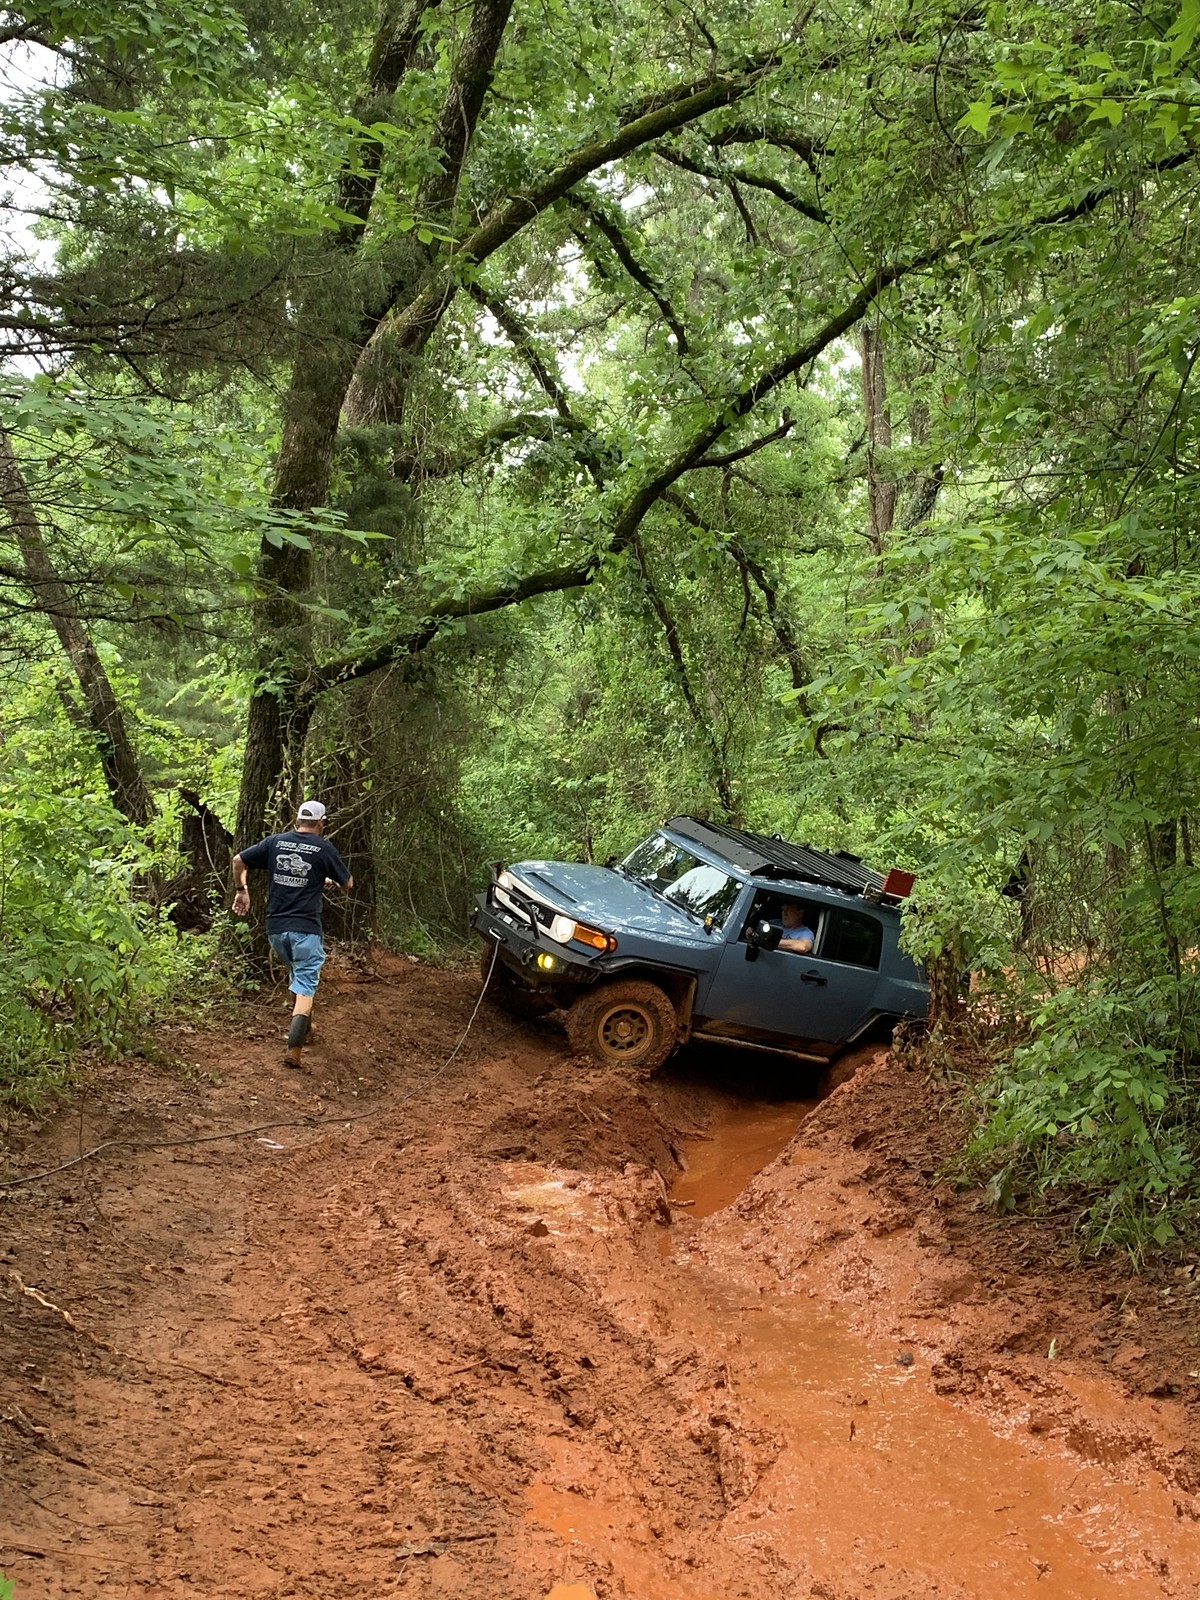
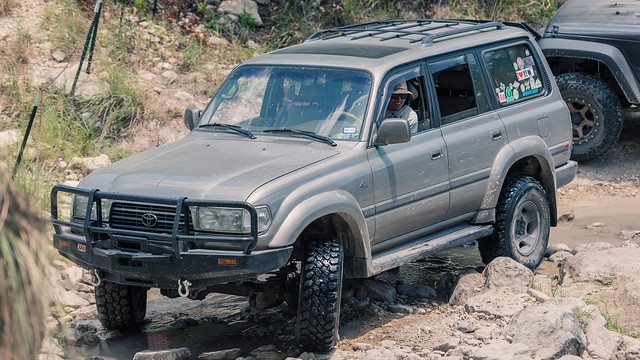
The level 2 trails that is easy in on the dry is a different animal when rain comes into factor. This FJ got it wrong, and this was triple locked and which too.
We made it out of he trail fine, it all about the lines you take really. 
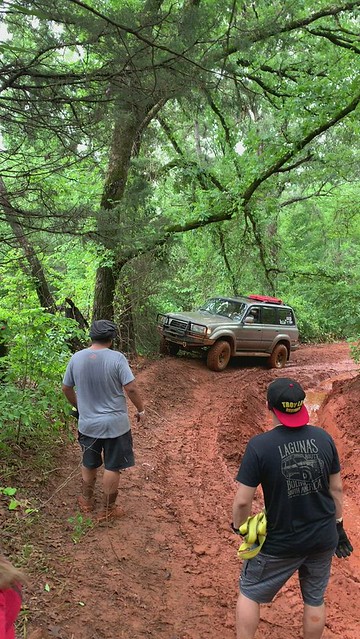
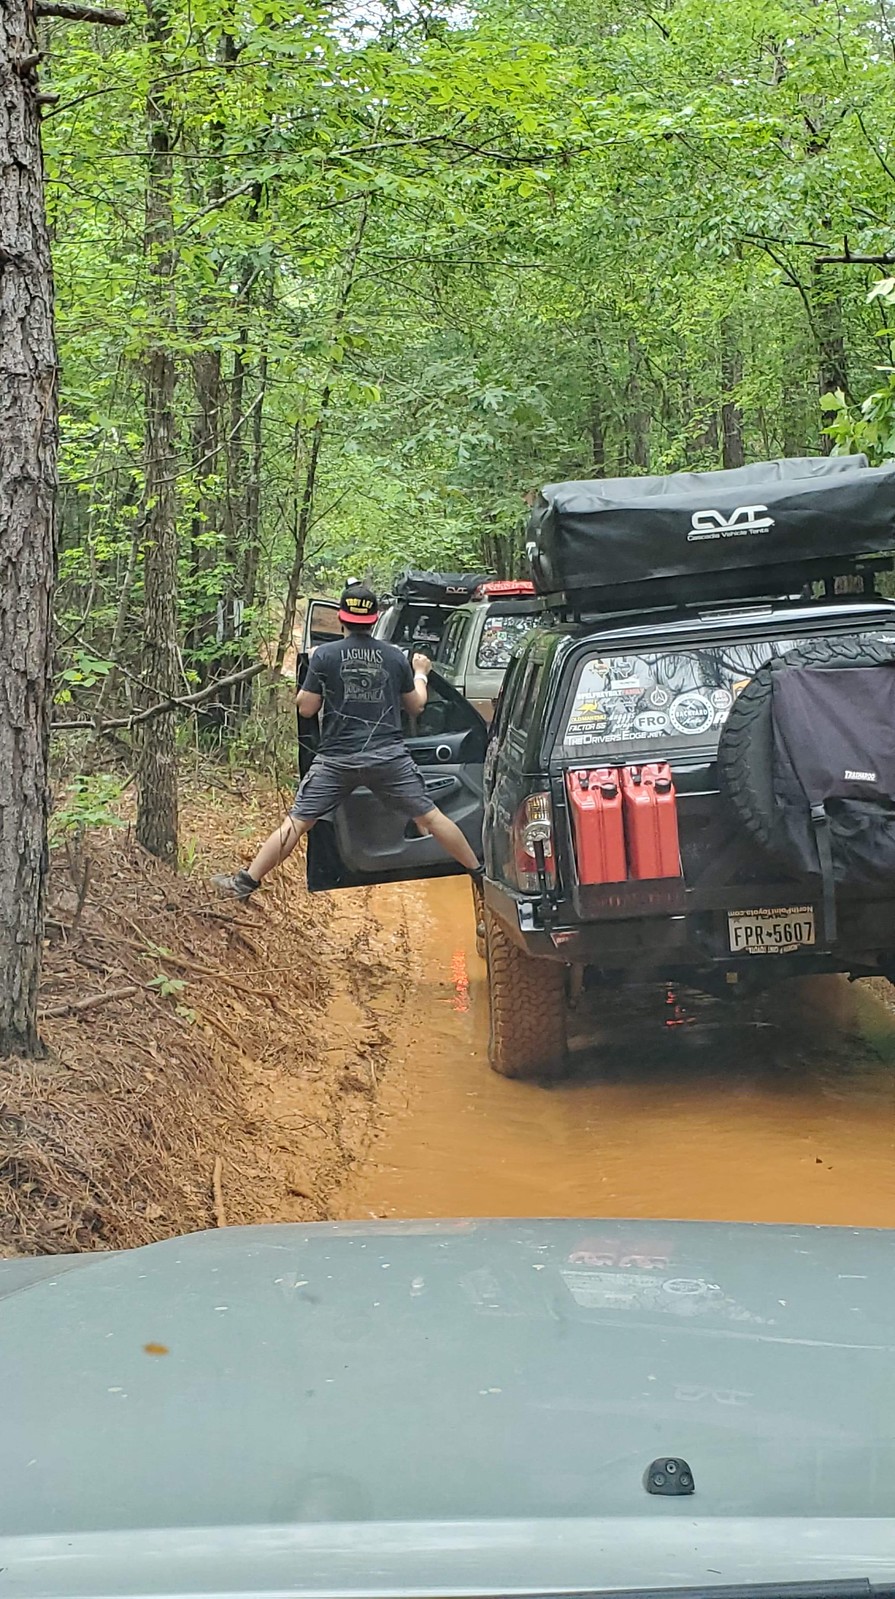
Then it started to rain more….. Felt like I was at a scene from Jarassic Park. Glad I was out with my friends, because I know I would have been stressing if I was by myself. 
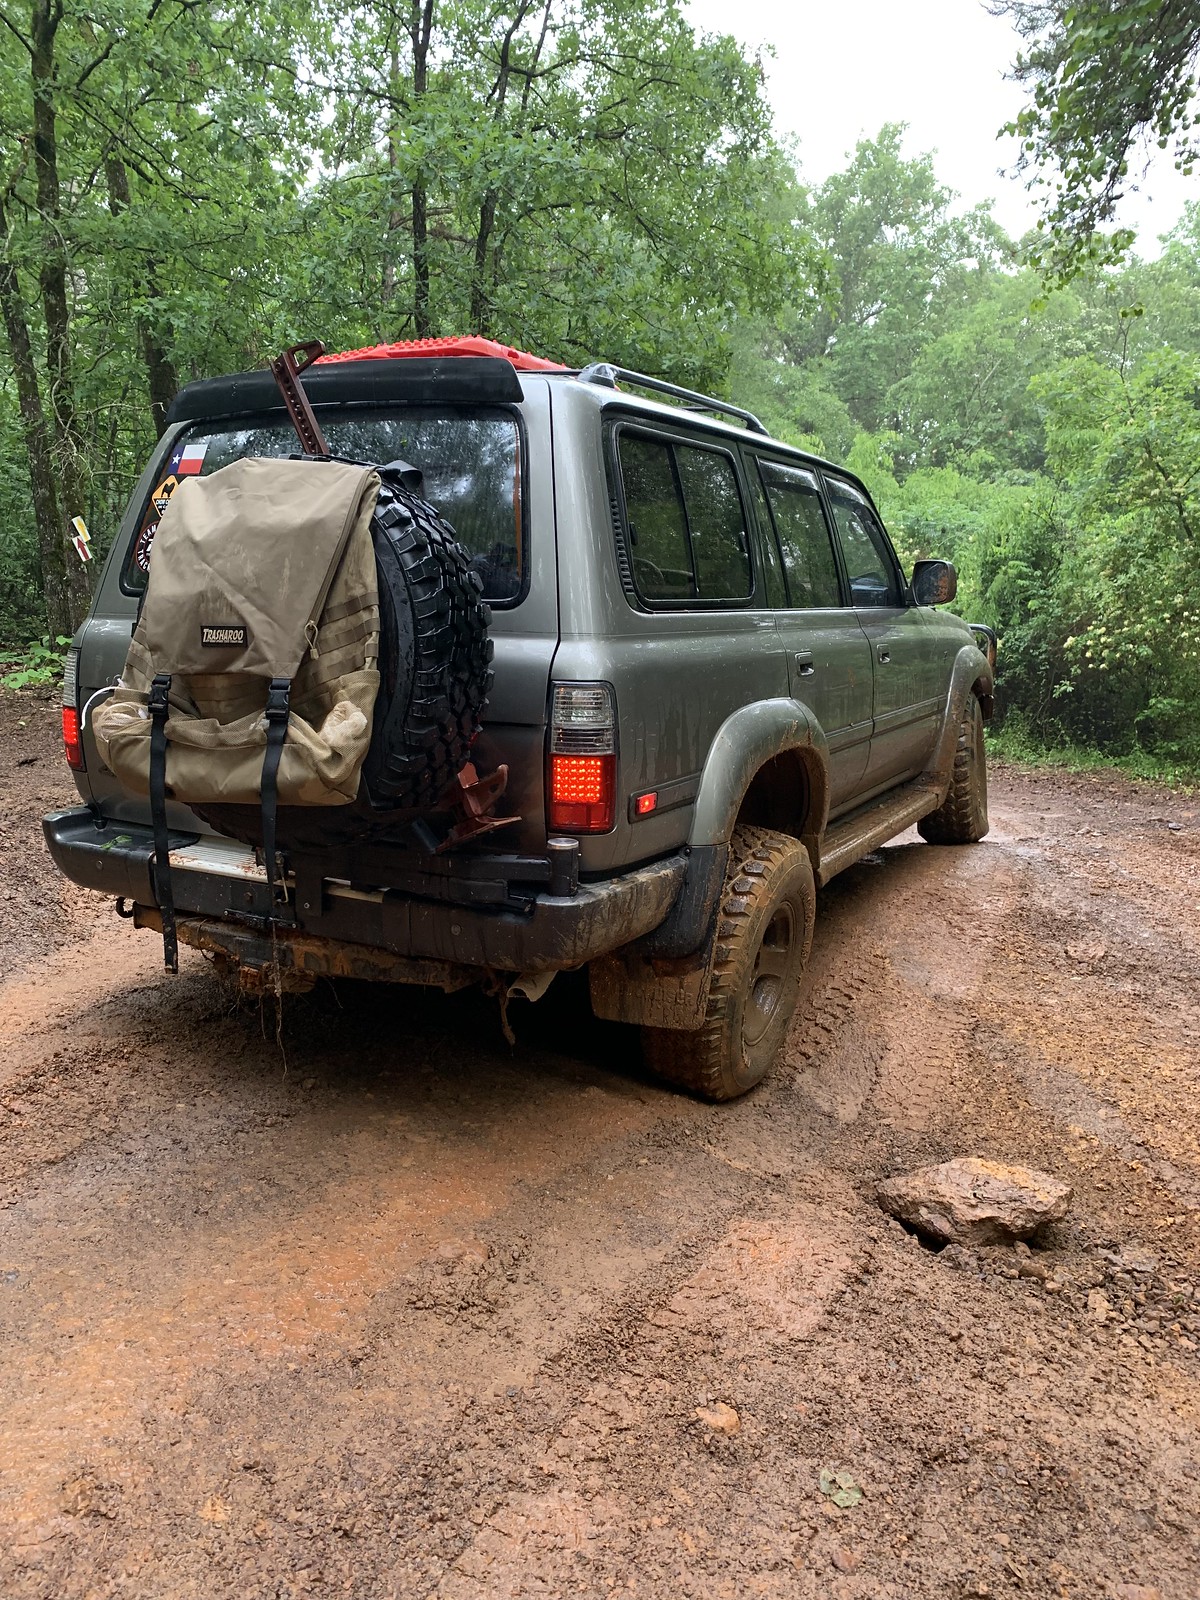
Flexing. The articulation on solid front axles are much better then independent suspension. The 80 series look soo good.
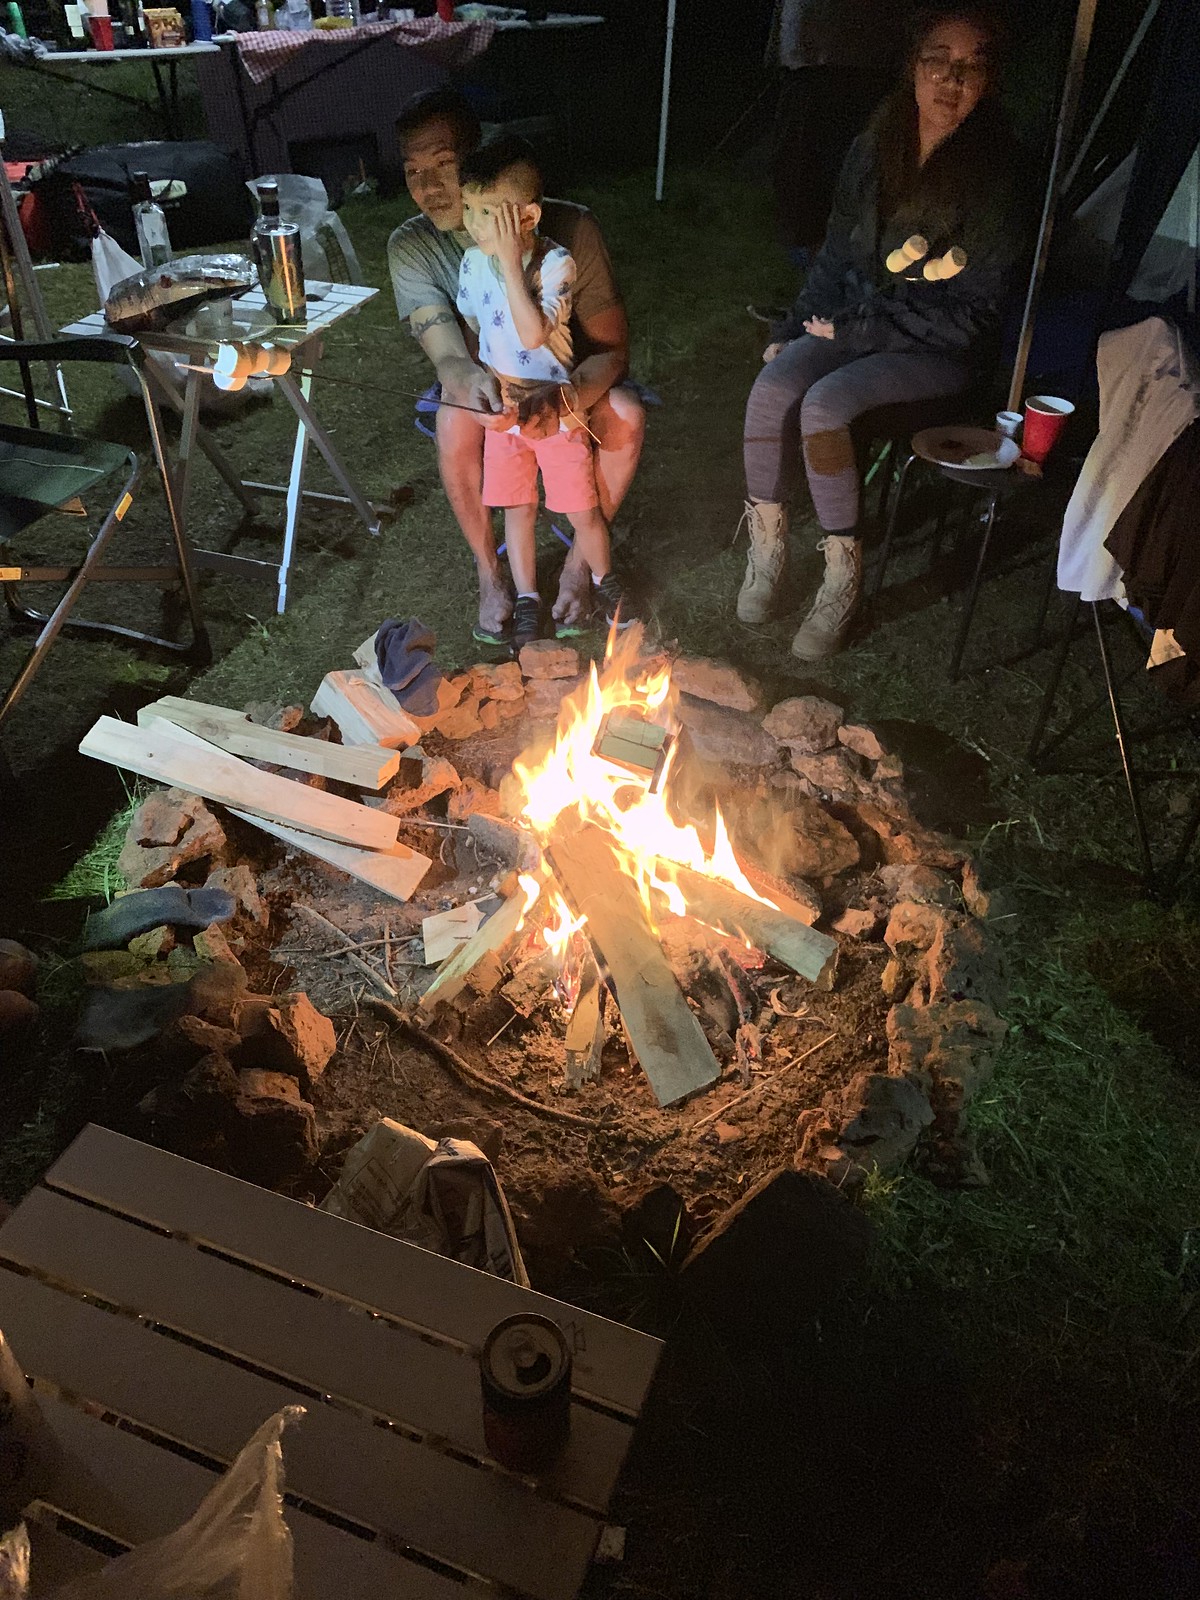
Finally back at camp. It did rain more but I was the fire master and no camp is complete without a camp fire. 
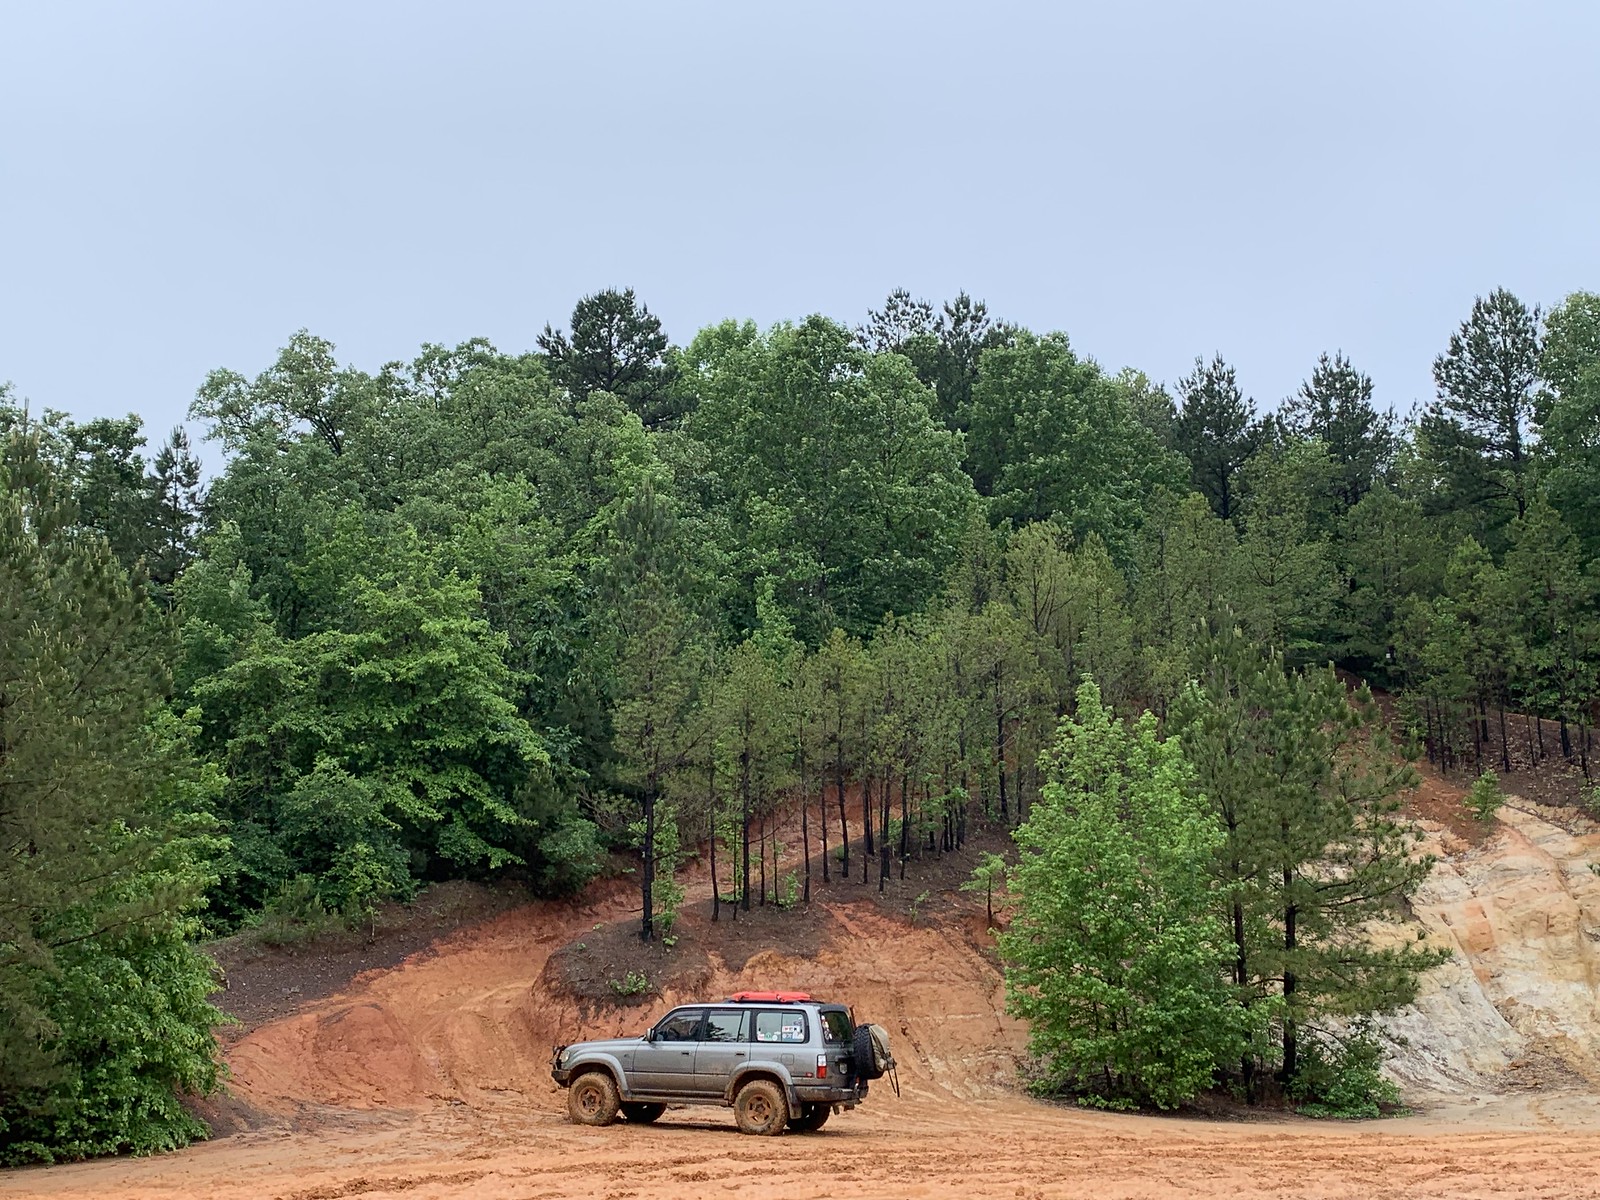
The next day as more fun wheeling and exploring the trails. Lambo up and early. 
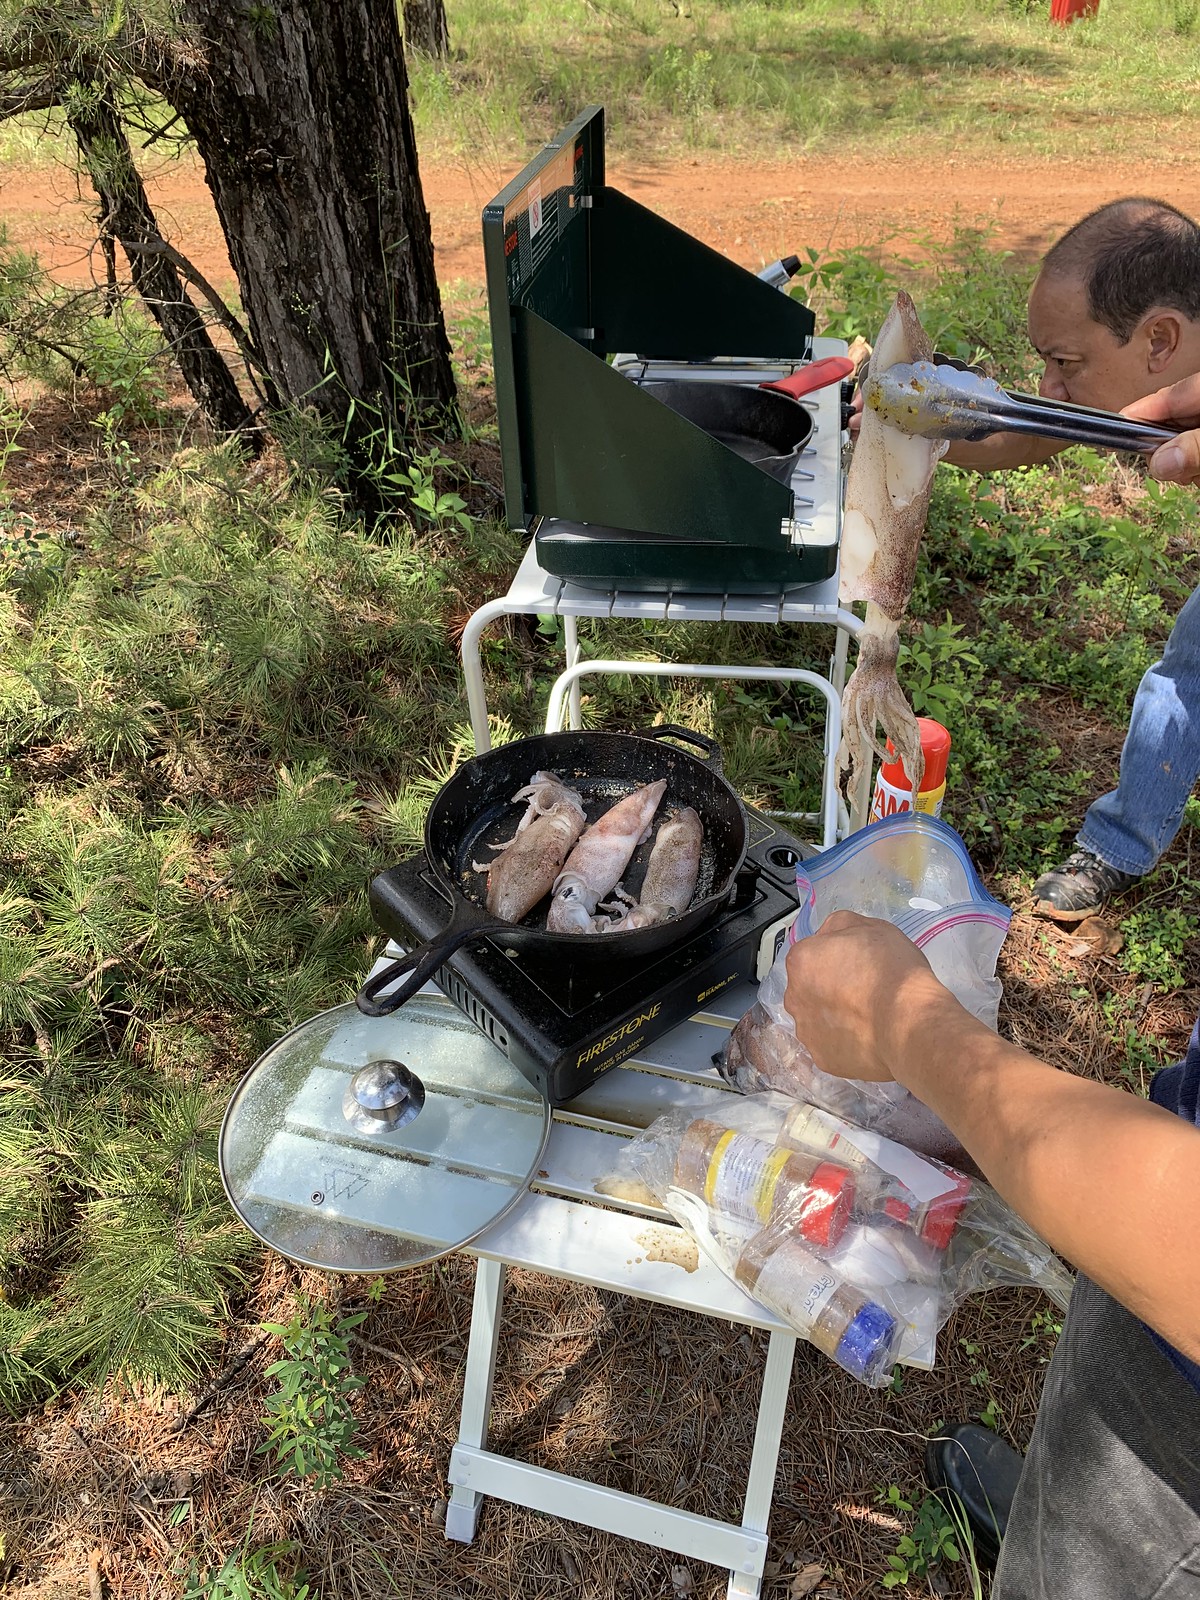
Our friends brought a lot of food too. This wasn’t the ham and cheese sandwich either. We were cooking in luxury.
The condo units of my friends rigs. 
We slept in the Land Cruiser and was pretty comfy. Thankfully it was a cold night so it wasn’t stuffy at all.
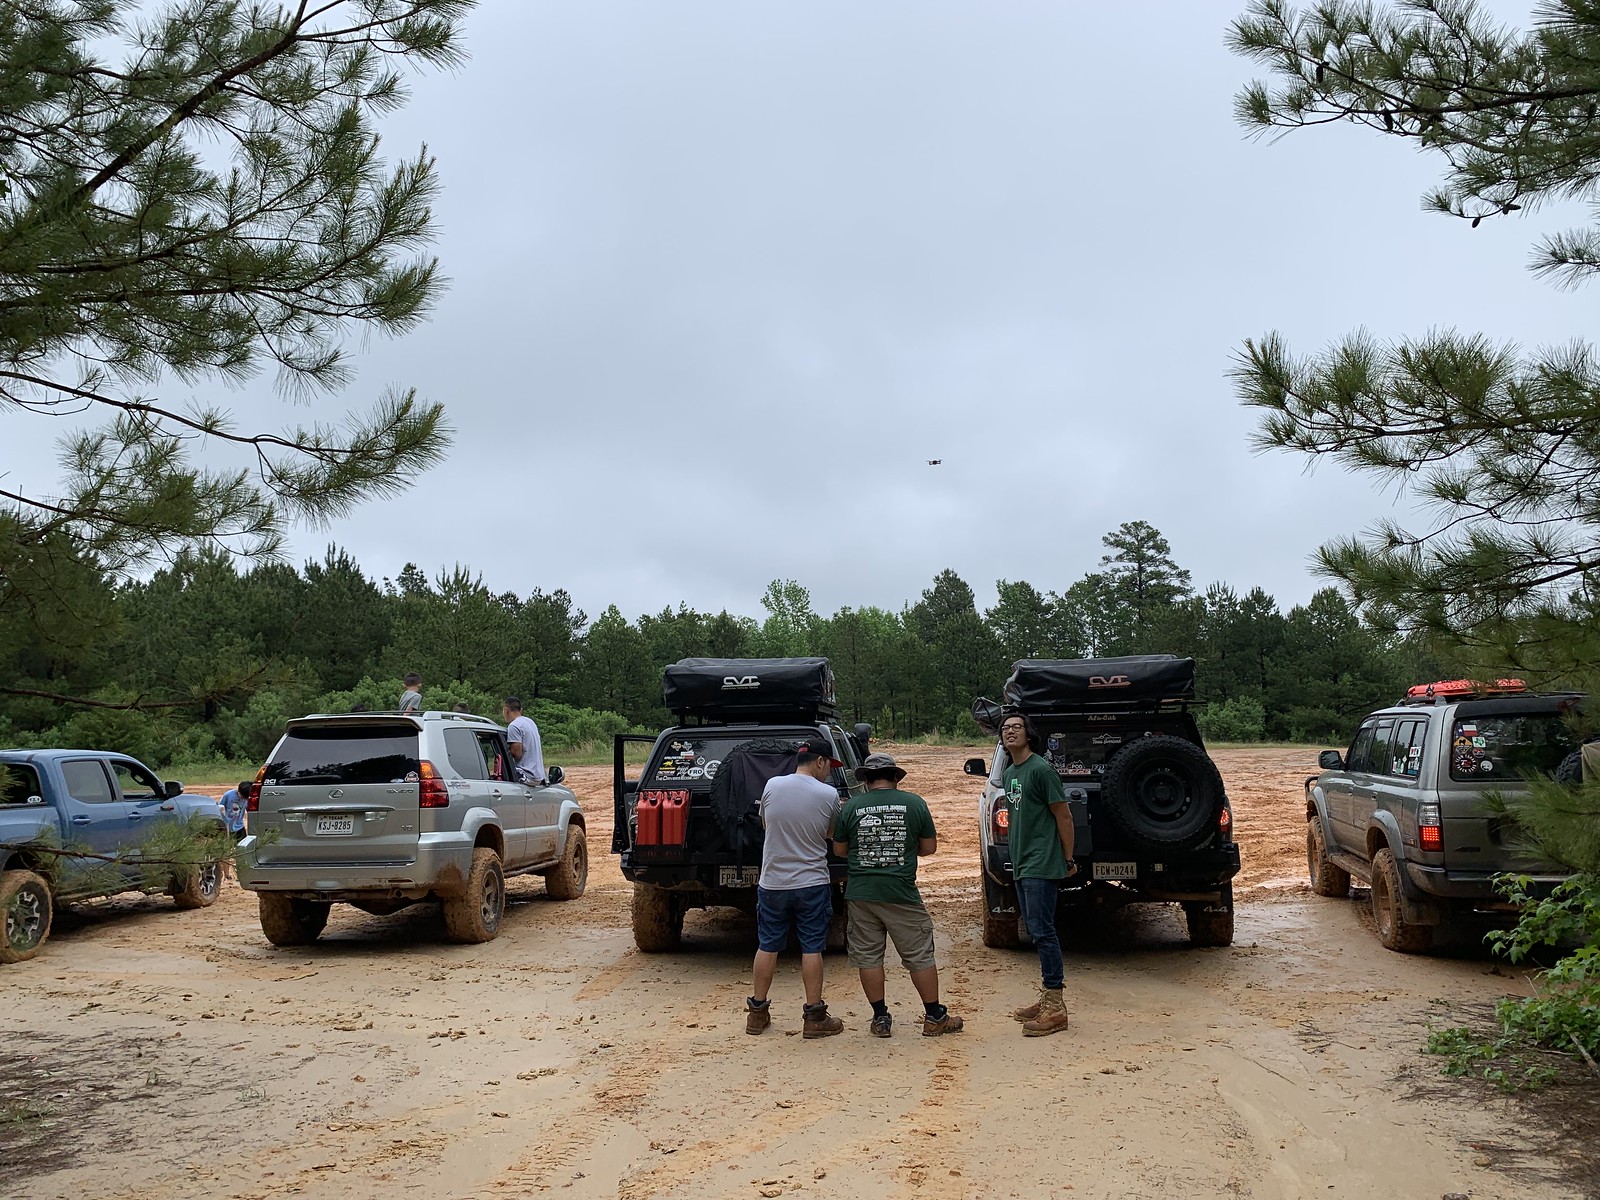
Mike and Allen working on flying the drone.
Lambo chilling with Chewy parents on the rooftop. Tooo cute.
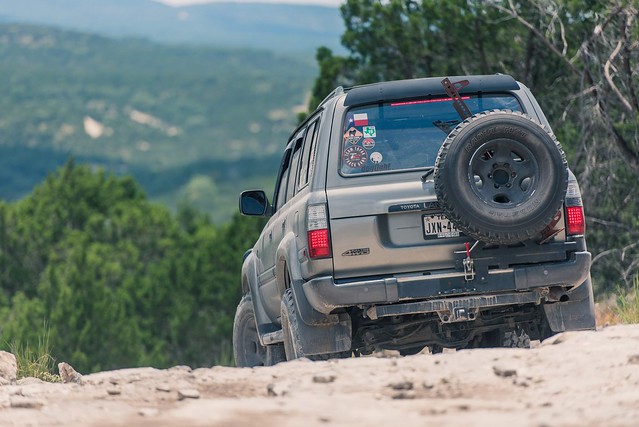
I sure love the way Land Cruiser look especially when it used on the trails.
Lunch time.
The base camp.
I did get stuck once, but thats why you go with your friends!!! 
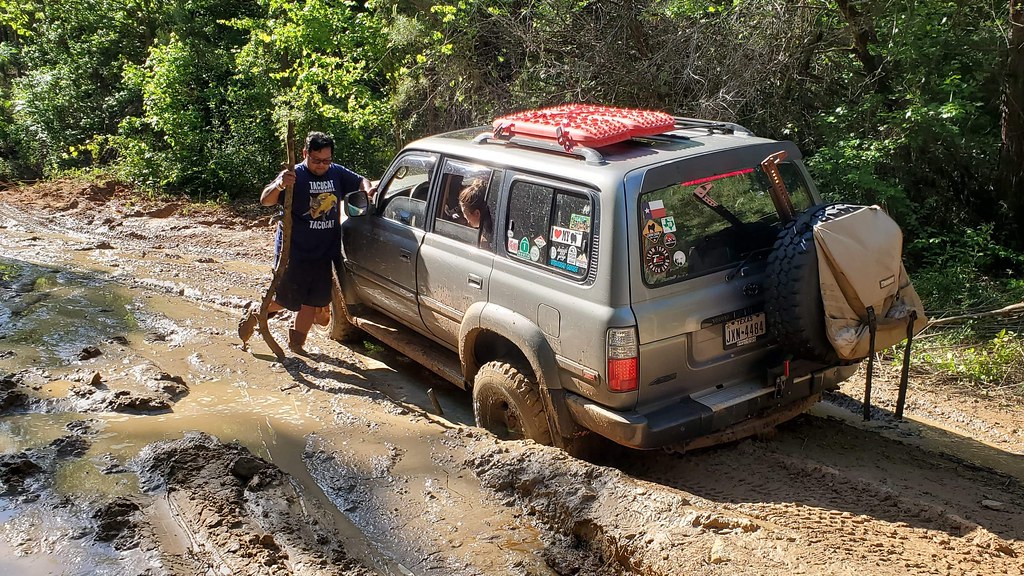
Looks good though. Har Ley help me out get unstuck, such a good friend. Eventually, I did have to get pulled out from Mike’s GX470. I did have my maxtrax but if you have another vehicle its just faster to use the recovery straps instead.
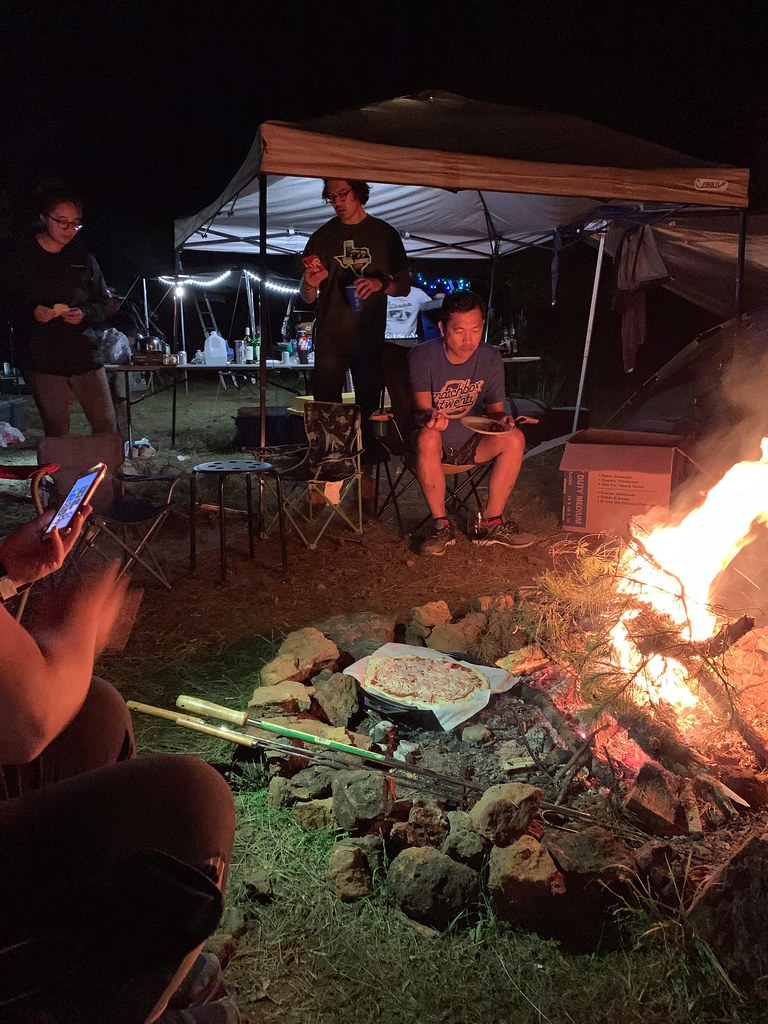
Back at camp, this time we had pizza. 
The next day we were still eating good.
After breakfast, we packed up and headed back home to Houston! This was a great experience and plan to do more often!


